Statistical Parametric Mapping (SPM)#
A tutorial for running a functional MRI analysis in SPM.
This tutorial was created by Steffen Bollmann.
Email: s.bollmannn@uq.edu.au
Github: @stebo85
Twitter: @sbollmann_MRI
This tutorial is based on the excellent tutorial from Andy’s Brain book: https://andysbrainbook.readthedocs.io/en/latest/SPM/SPM_Overview.html Our version here is a shortened and adjusted version for using on the Neurodesk platform.
Download data#
First, let’s download the data. We will use this open dataset: https://openneuro.org/datasets/ds000102/versions/00001/download
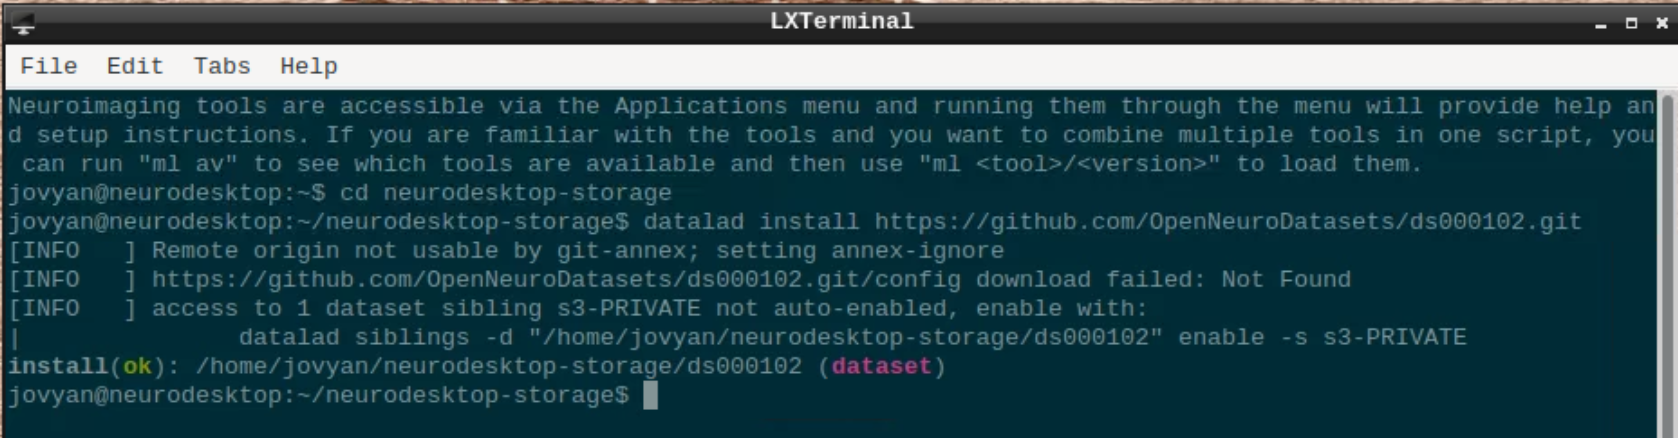
Open a terminal and use datalad to install the dataset:
cd neurodesktop-storage
datalad install https://github.com/OpenNeuroDatasets/ds000102.git
We will use subject 08 as an example here, so we use datalad to download sub-08 and since SPM doesn’t support compressed files, we need to unpack them:
cd ds000102
datalad get sub-08/
gunzip sub-08/anat/sub-08_T1w.nii.gz -f
gunzip sub-08/func/sub-08_task-flanker_run-1_bold.nii.gz -f
gunzip sub-08/func/sub-08_task-flanker_run-2_bold.nii.gz -f
chmod a+rw sub-08/ -R
The task used is described here: https://andysbrainbook.readthedocs.io/en/latest/SPM/SPM_Short_Course/SPM_02_Flanker.html
Starting SPM and visualizing the data#
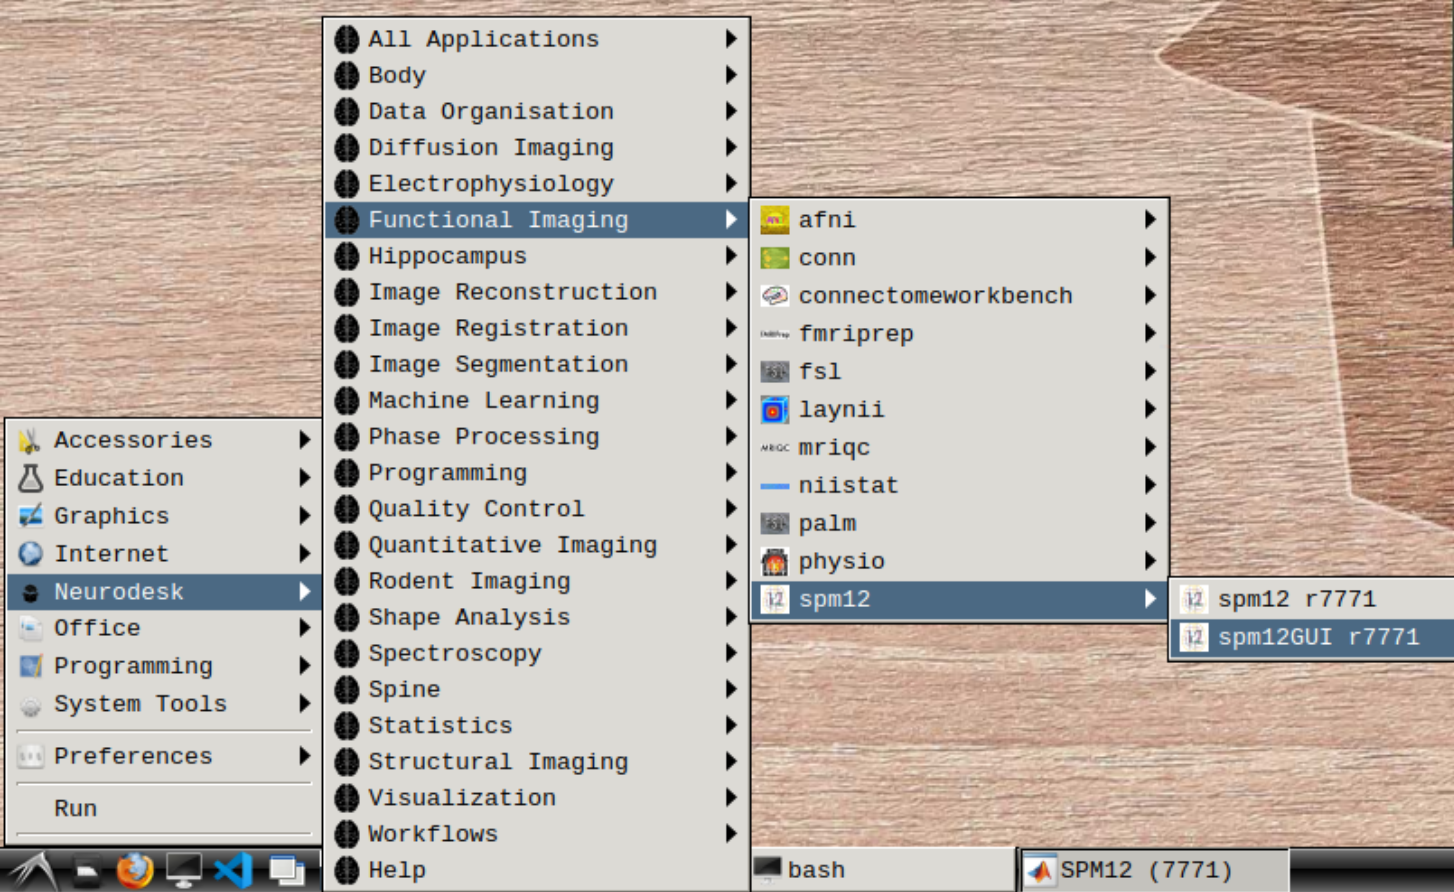
Start spm12GUI from the Application Menu:
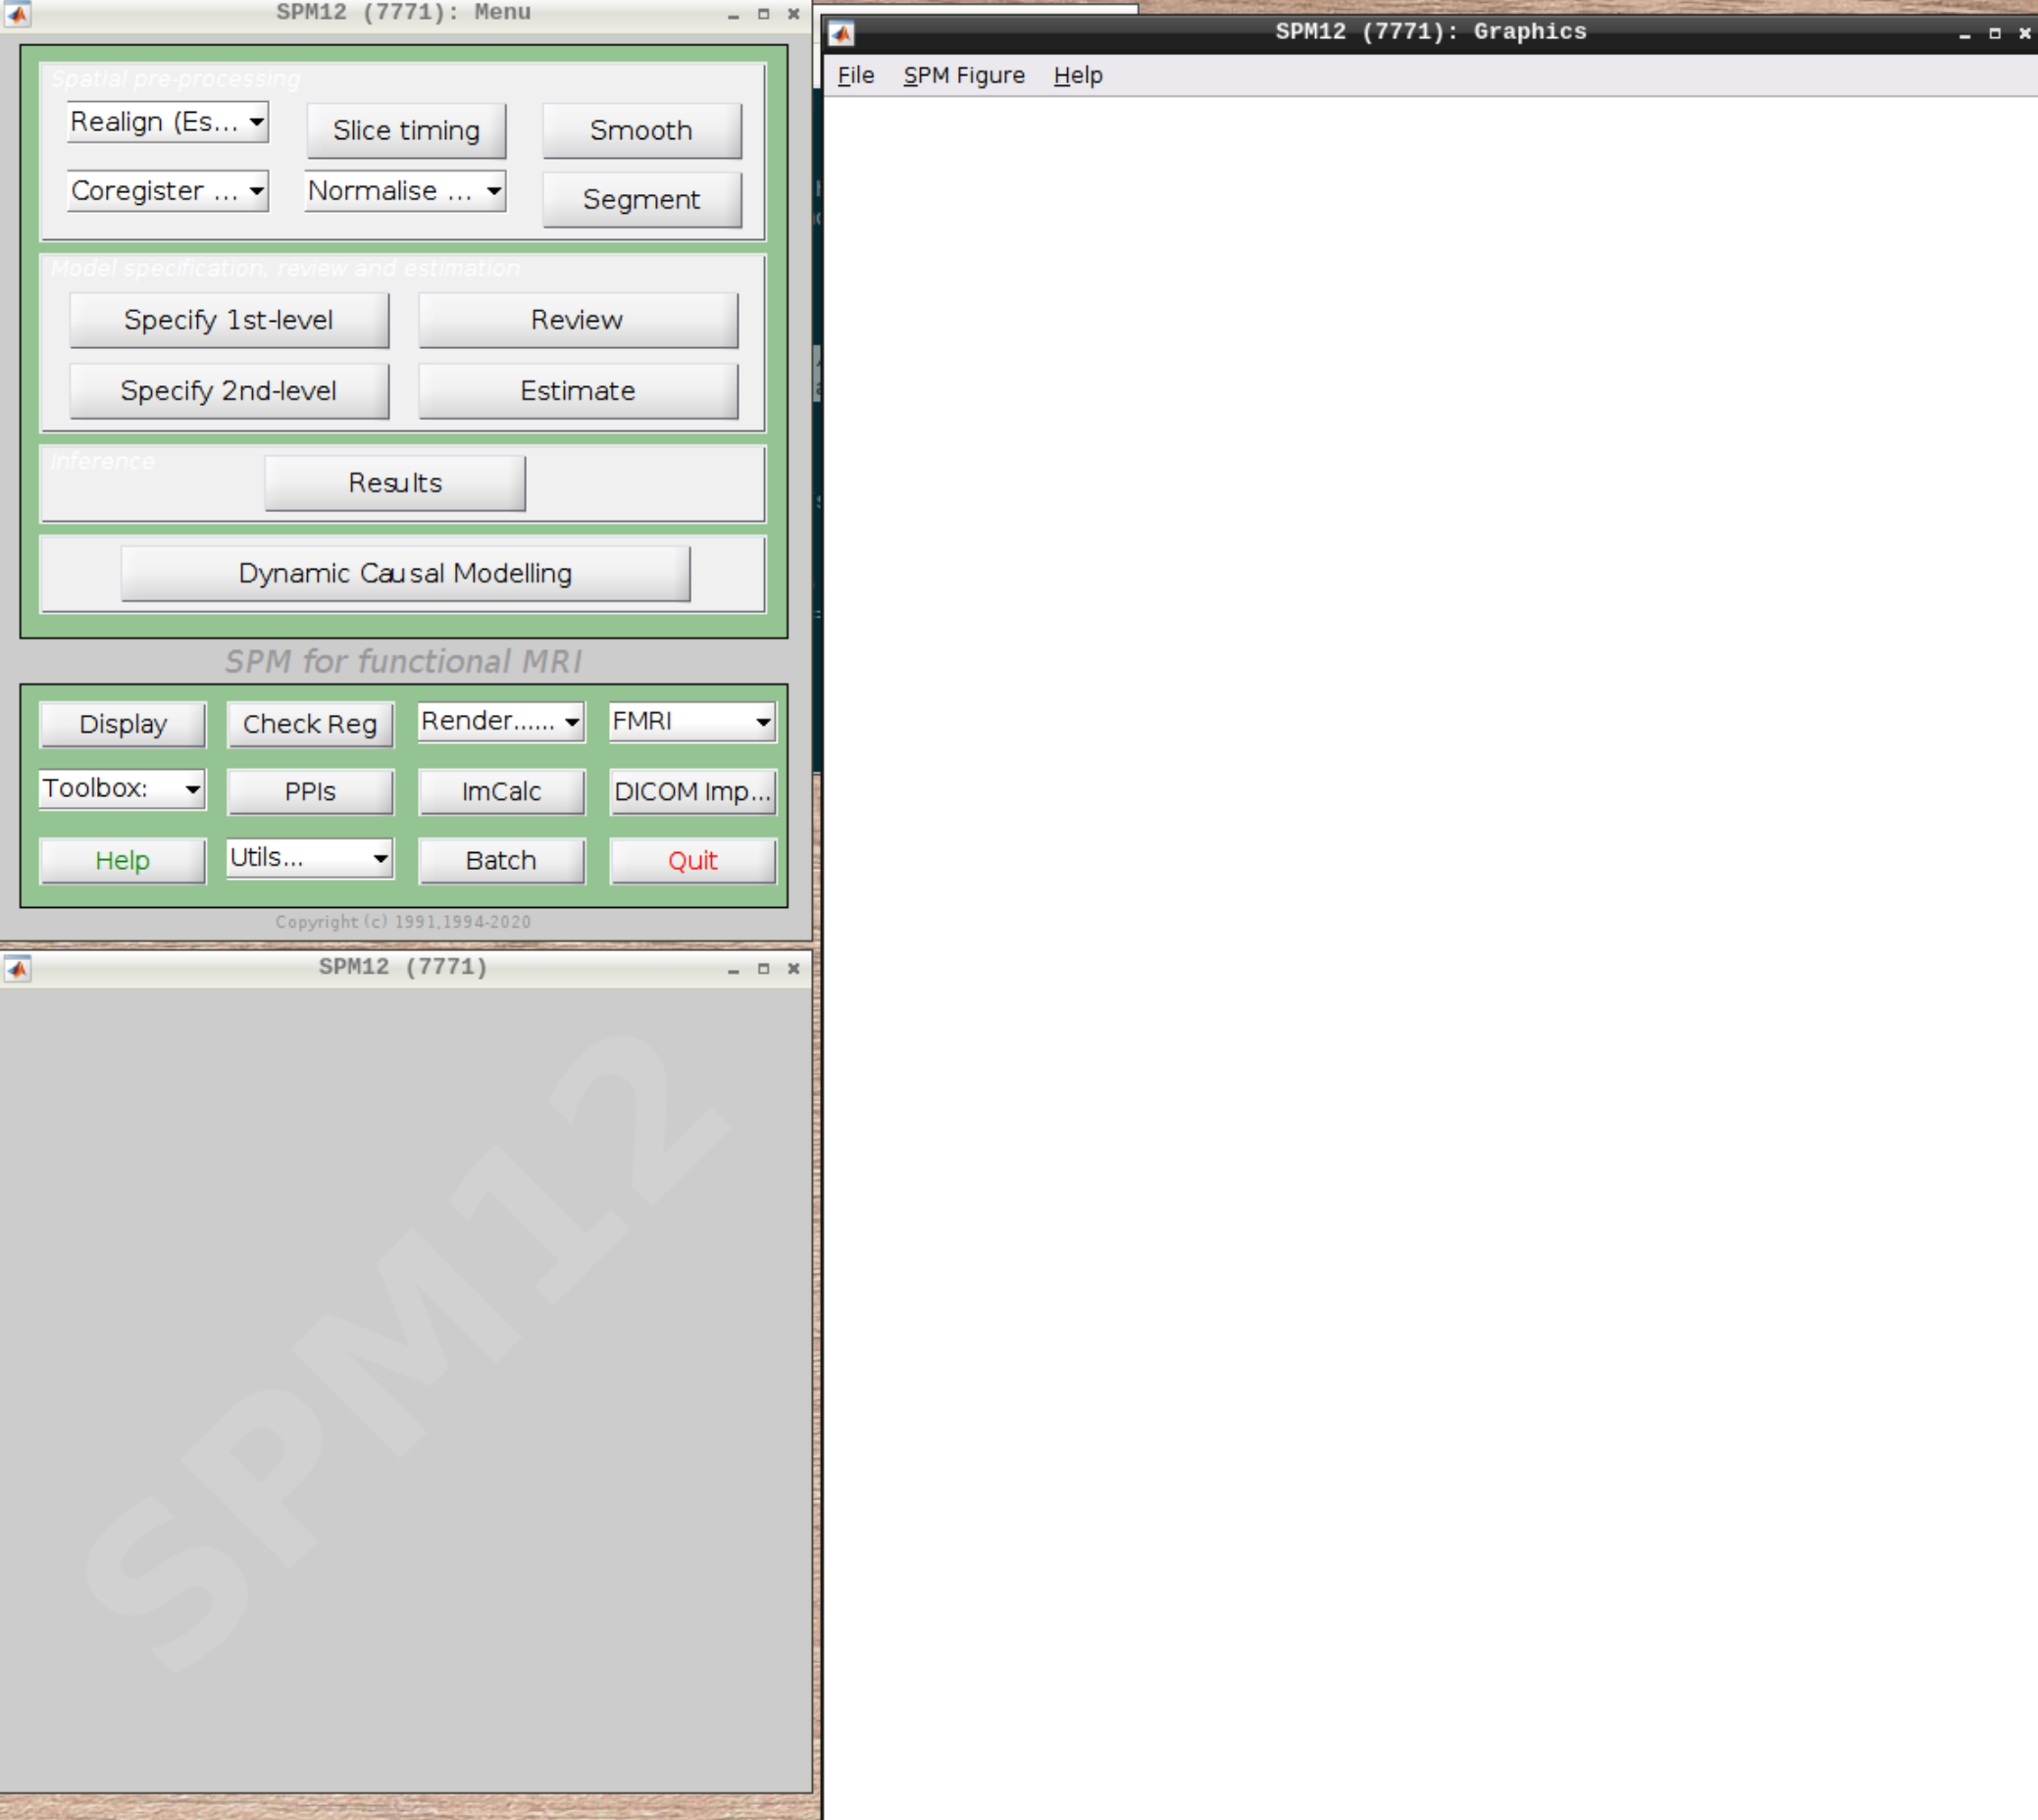
When the SPM menu loaded, click on fMRI and the full SPM interface should open up:
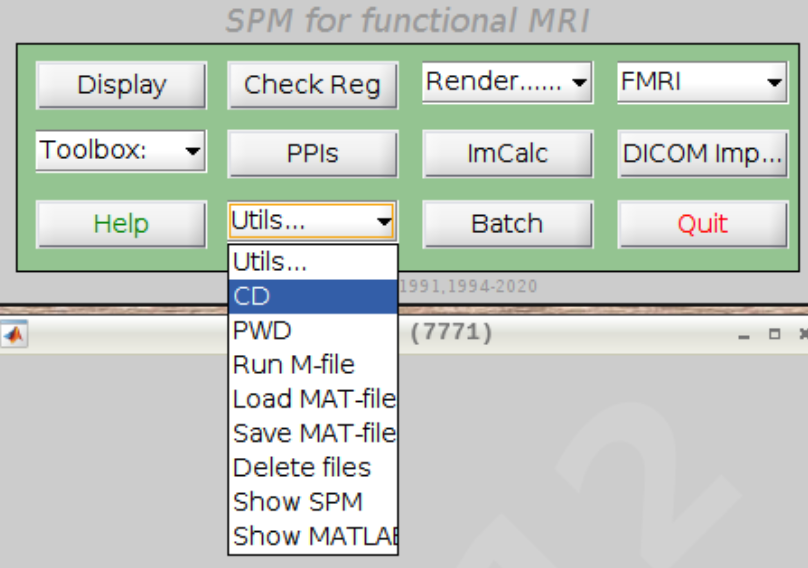
For convenience let’s change our default directory to our example subject. Click on Utils and select CD:
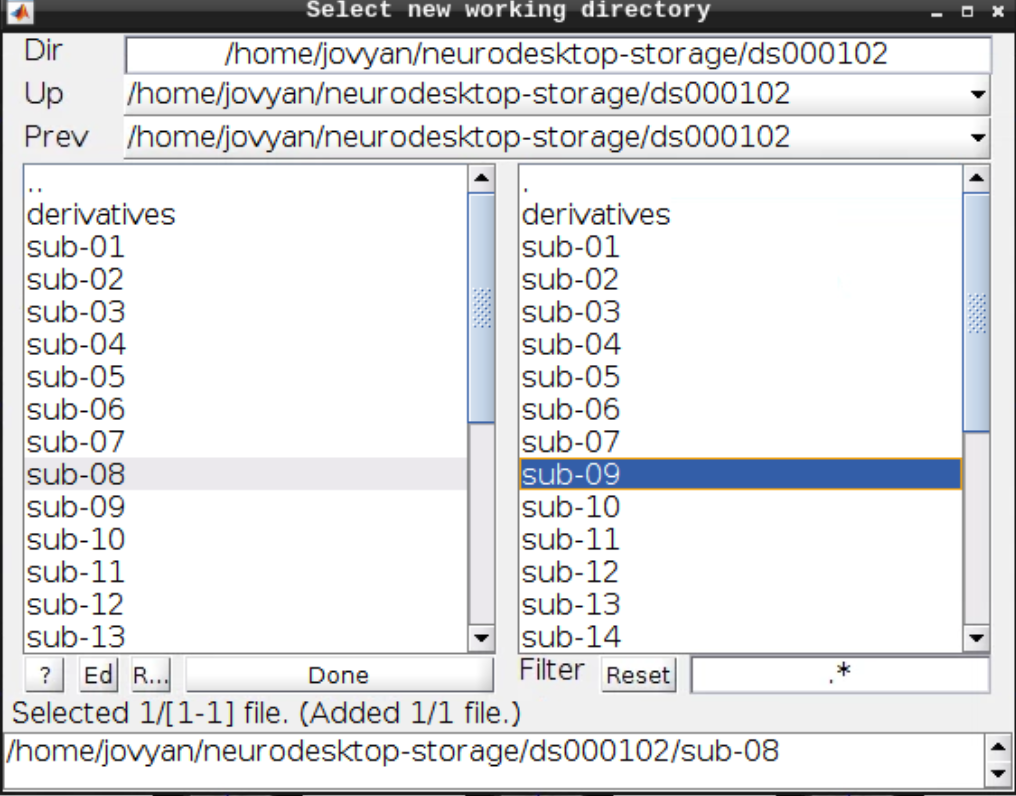
Then navigate to sub-08 and select the directory in the right browser window:
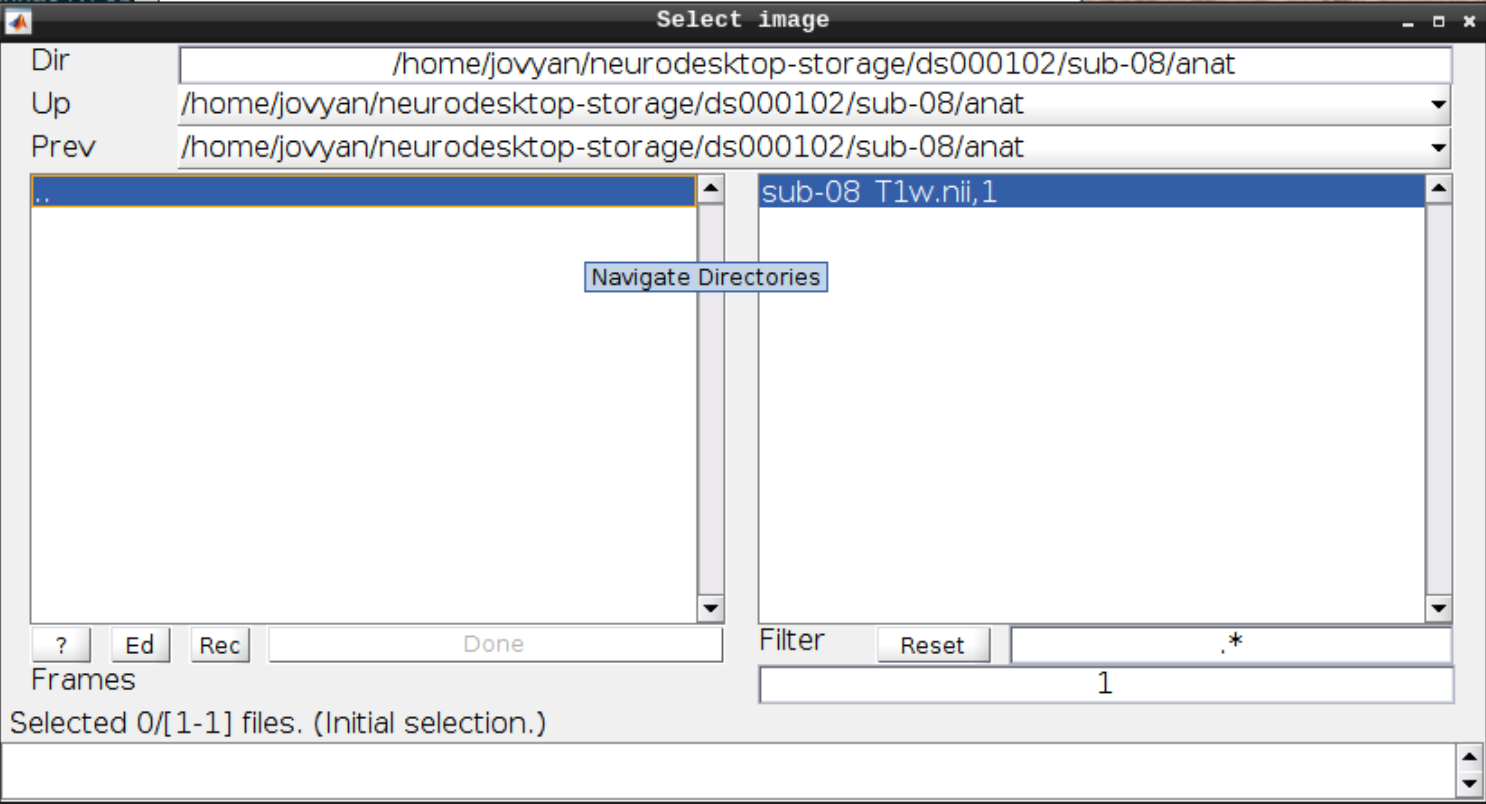
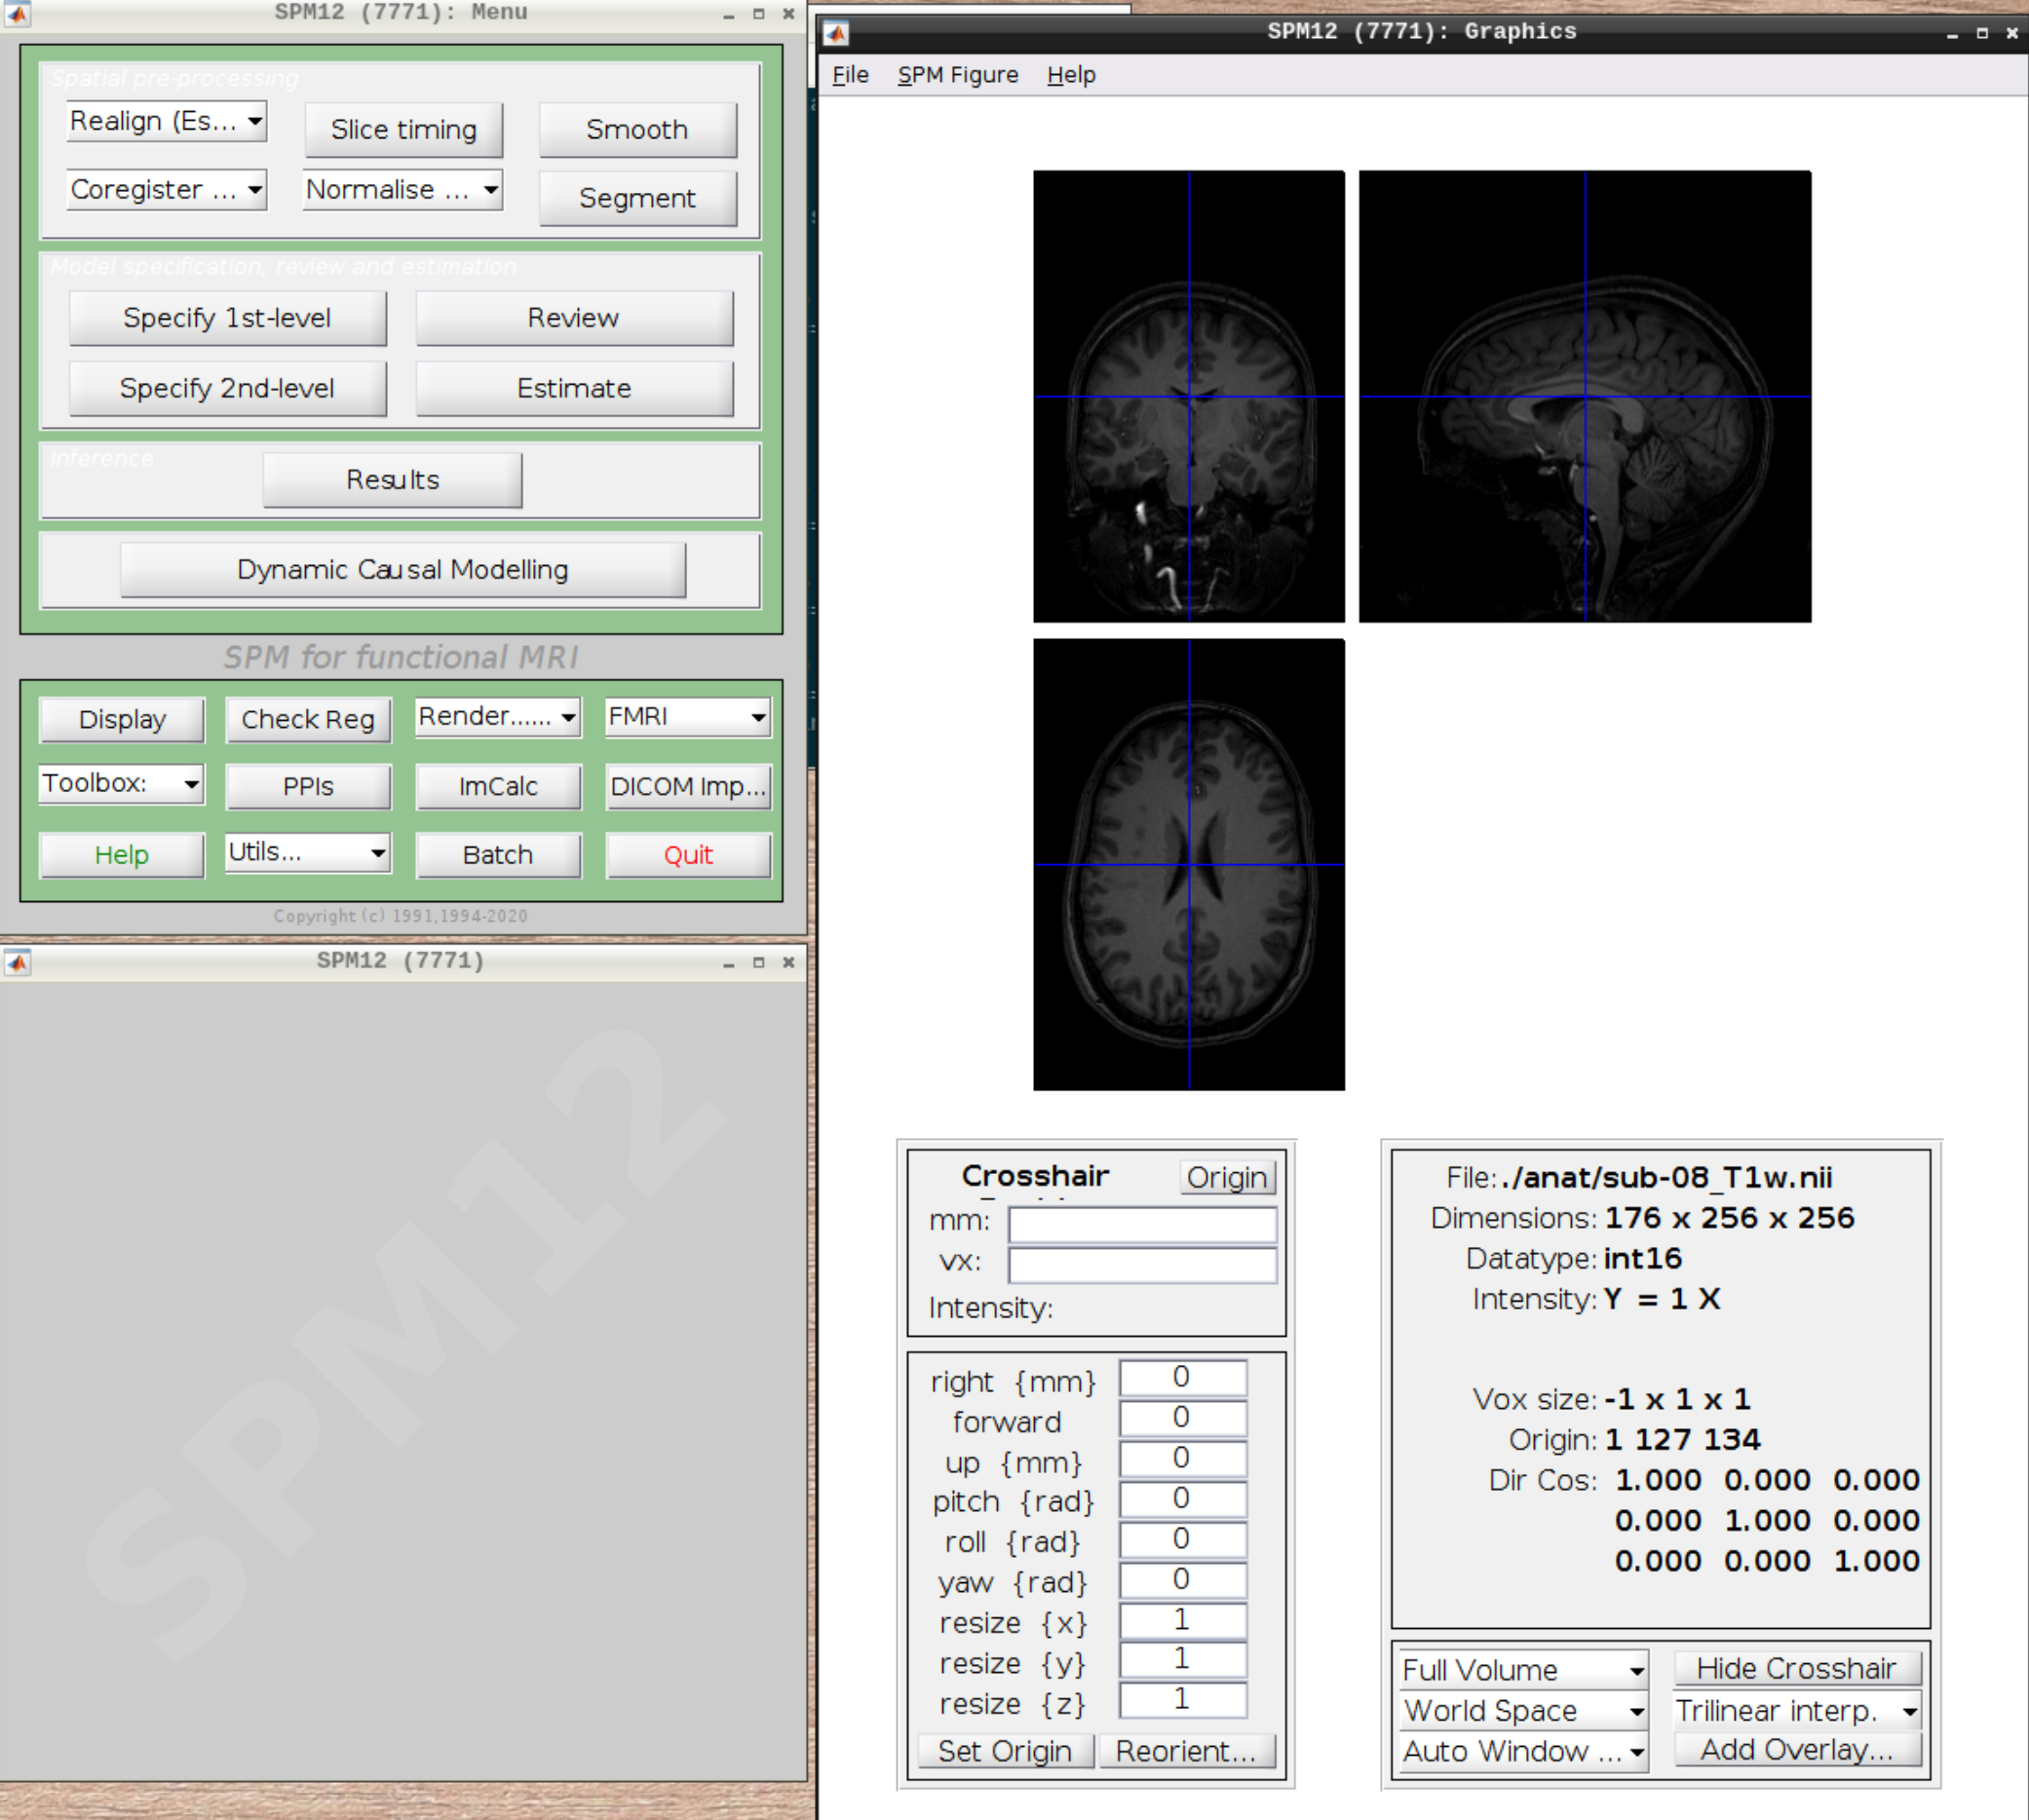
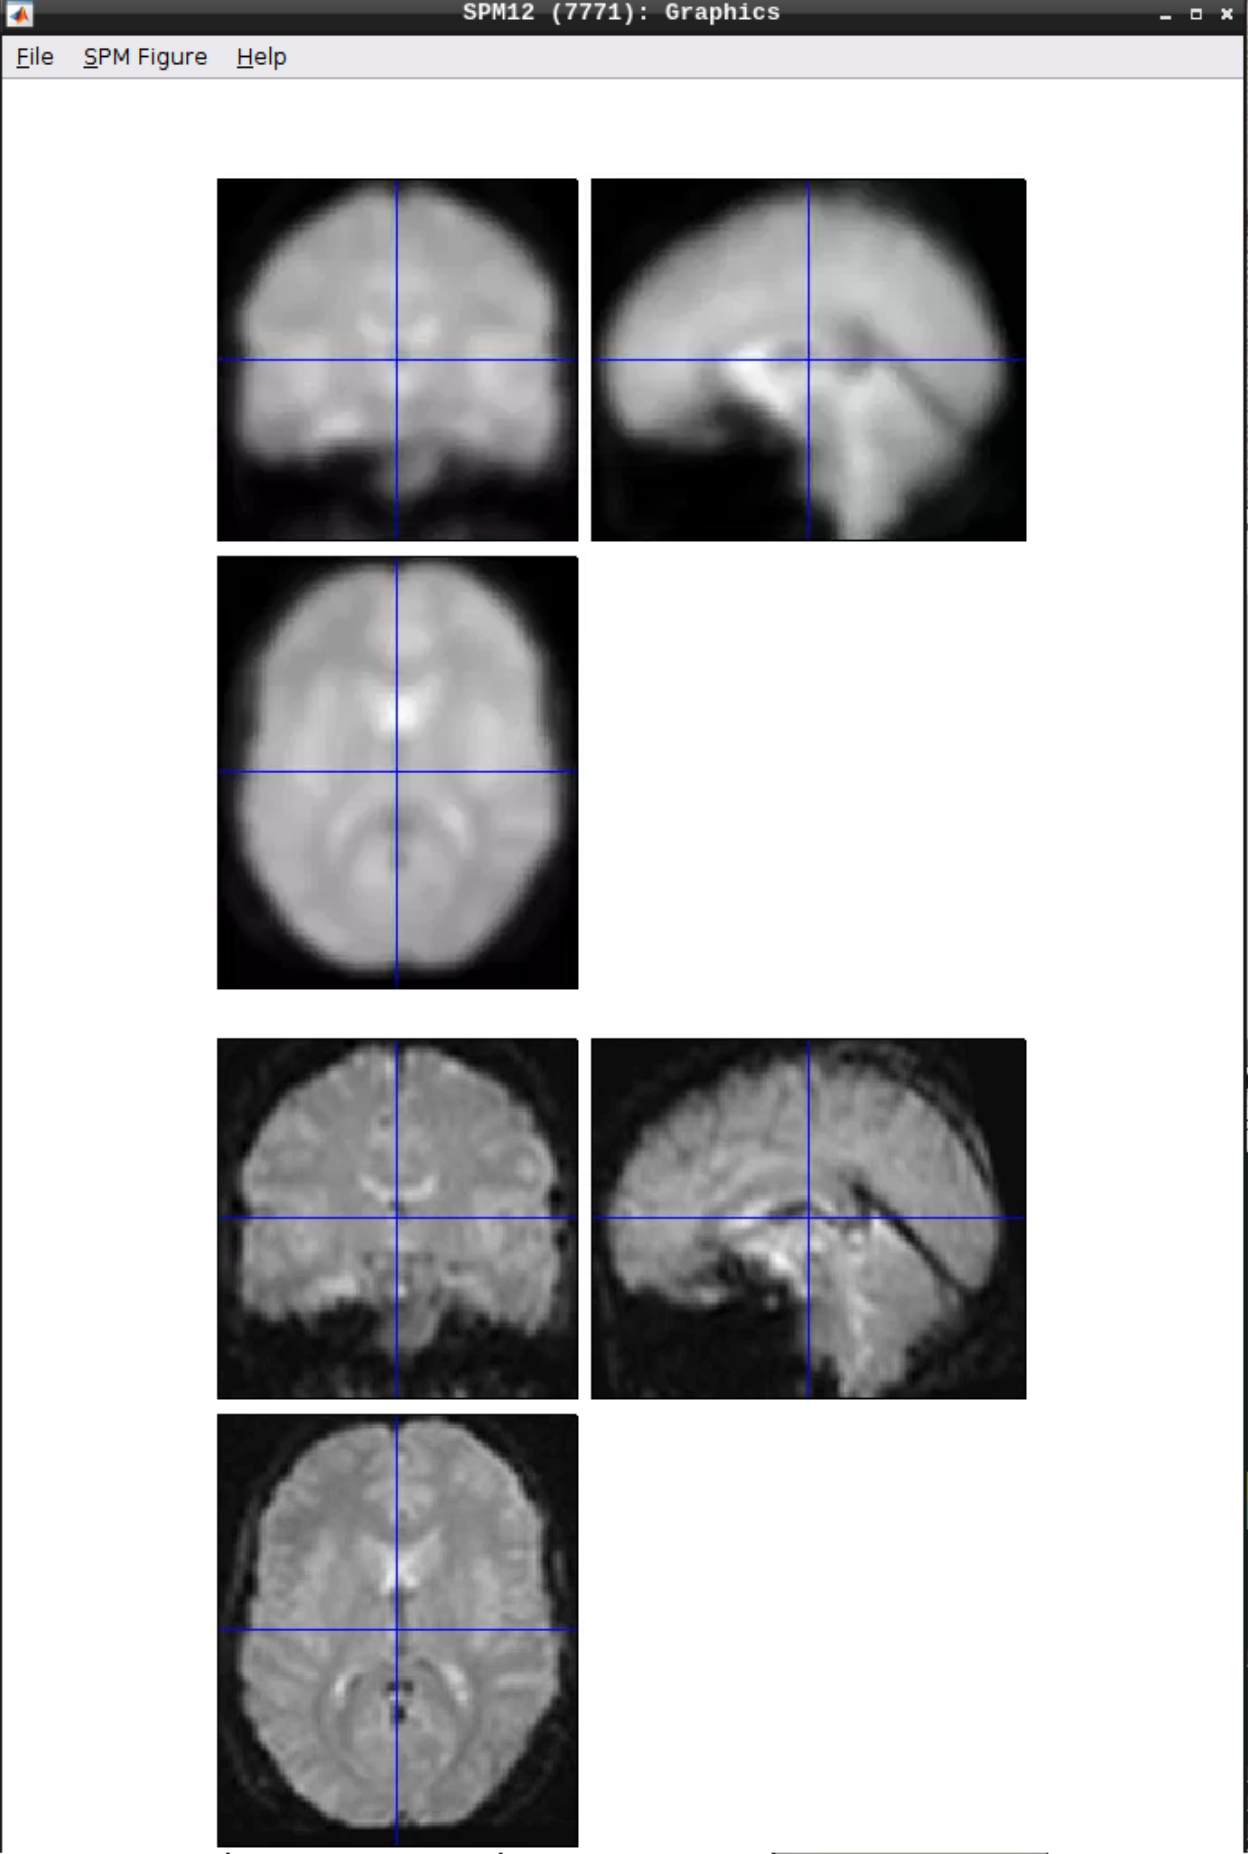
Now let’s visualize the anatomical T1 scan of subject 08 by clicking on Display and navigating and selecting the anatomical scan:
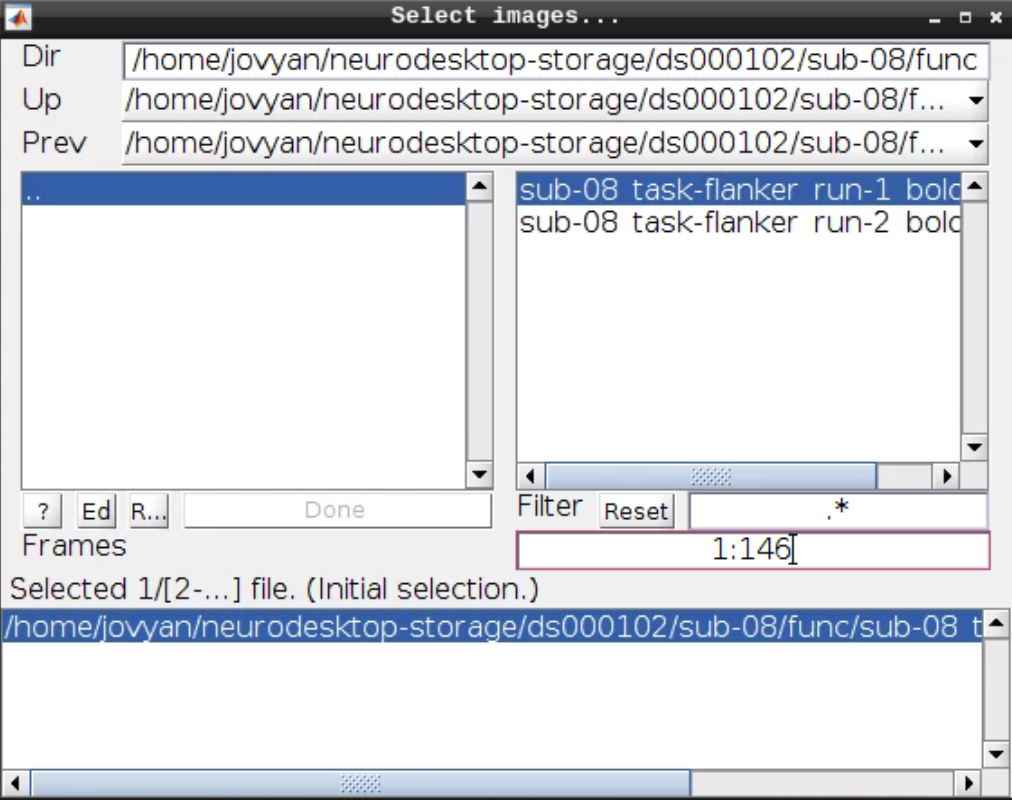
Now let’s look at the functional scans. Use CheckReg and open run-01. Then right click and Browse .... Then set frames to 1:146 and right click Select All
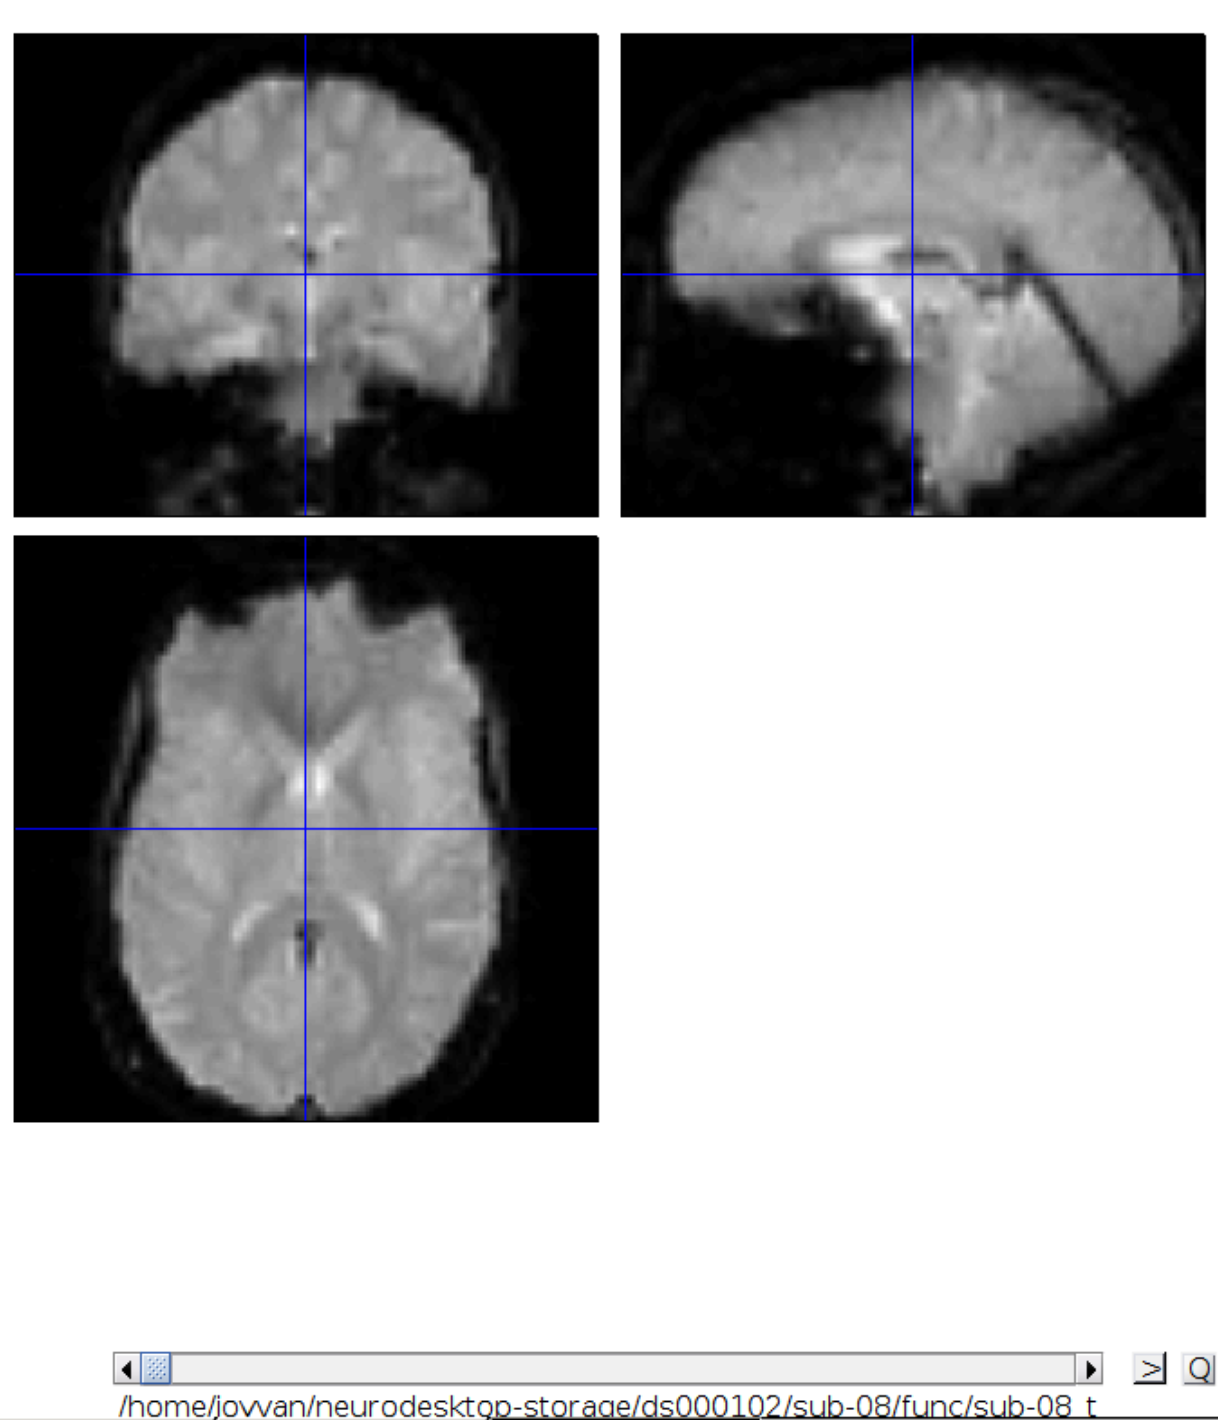
Now we get a slider viewer and we can investigate all functional scans:
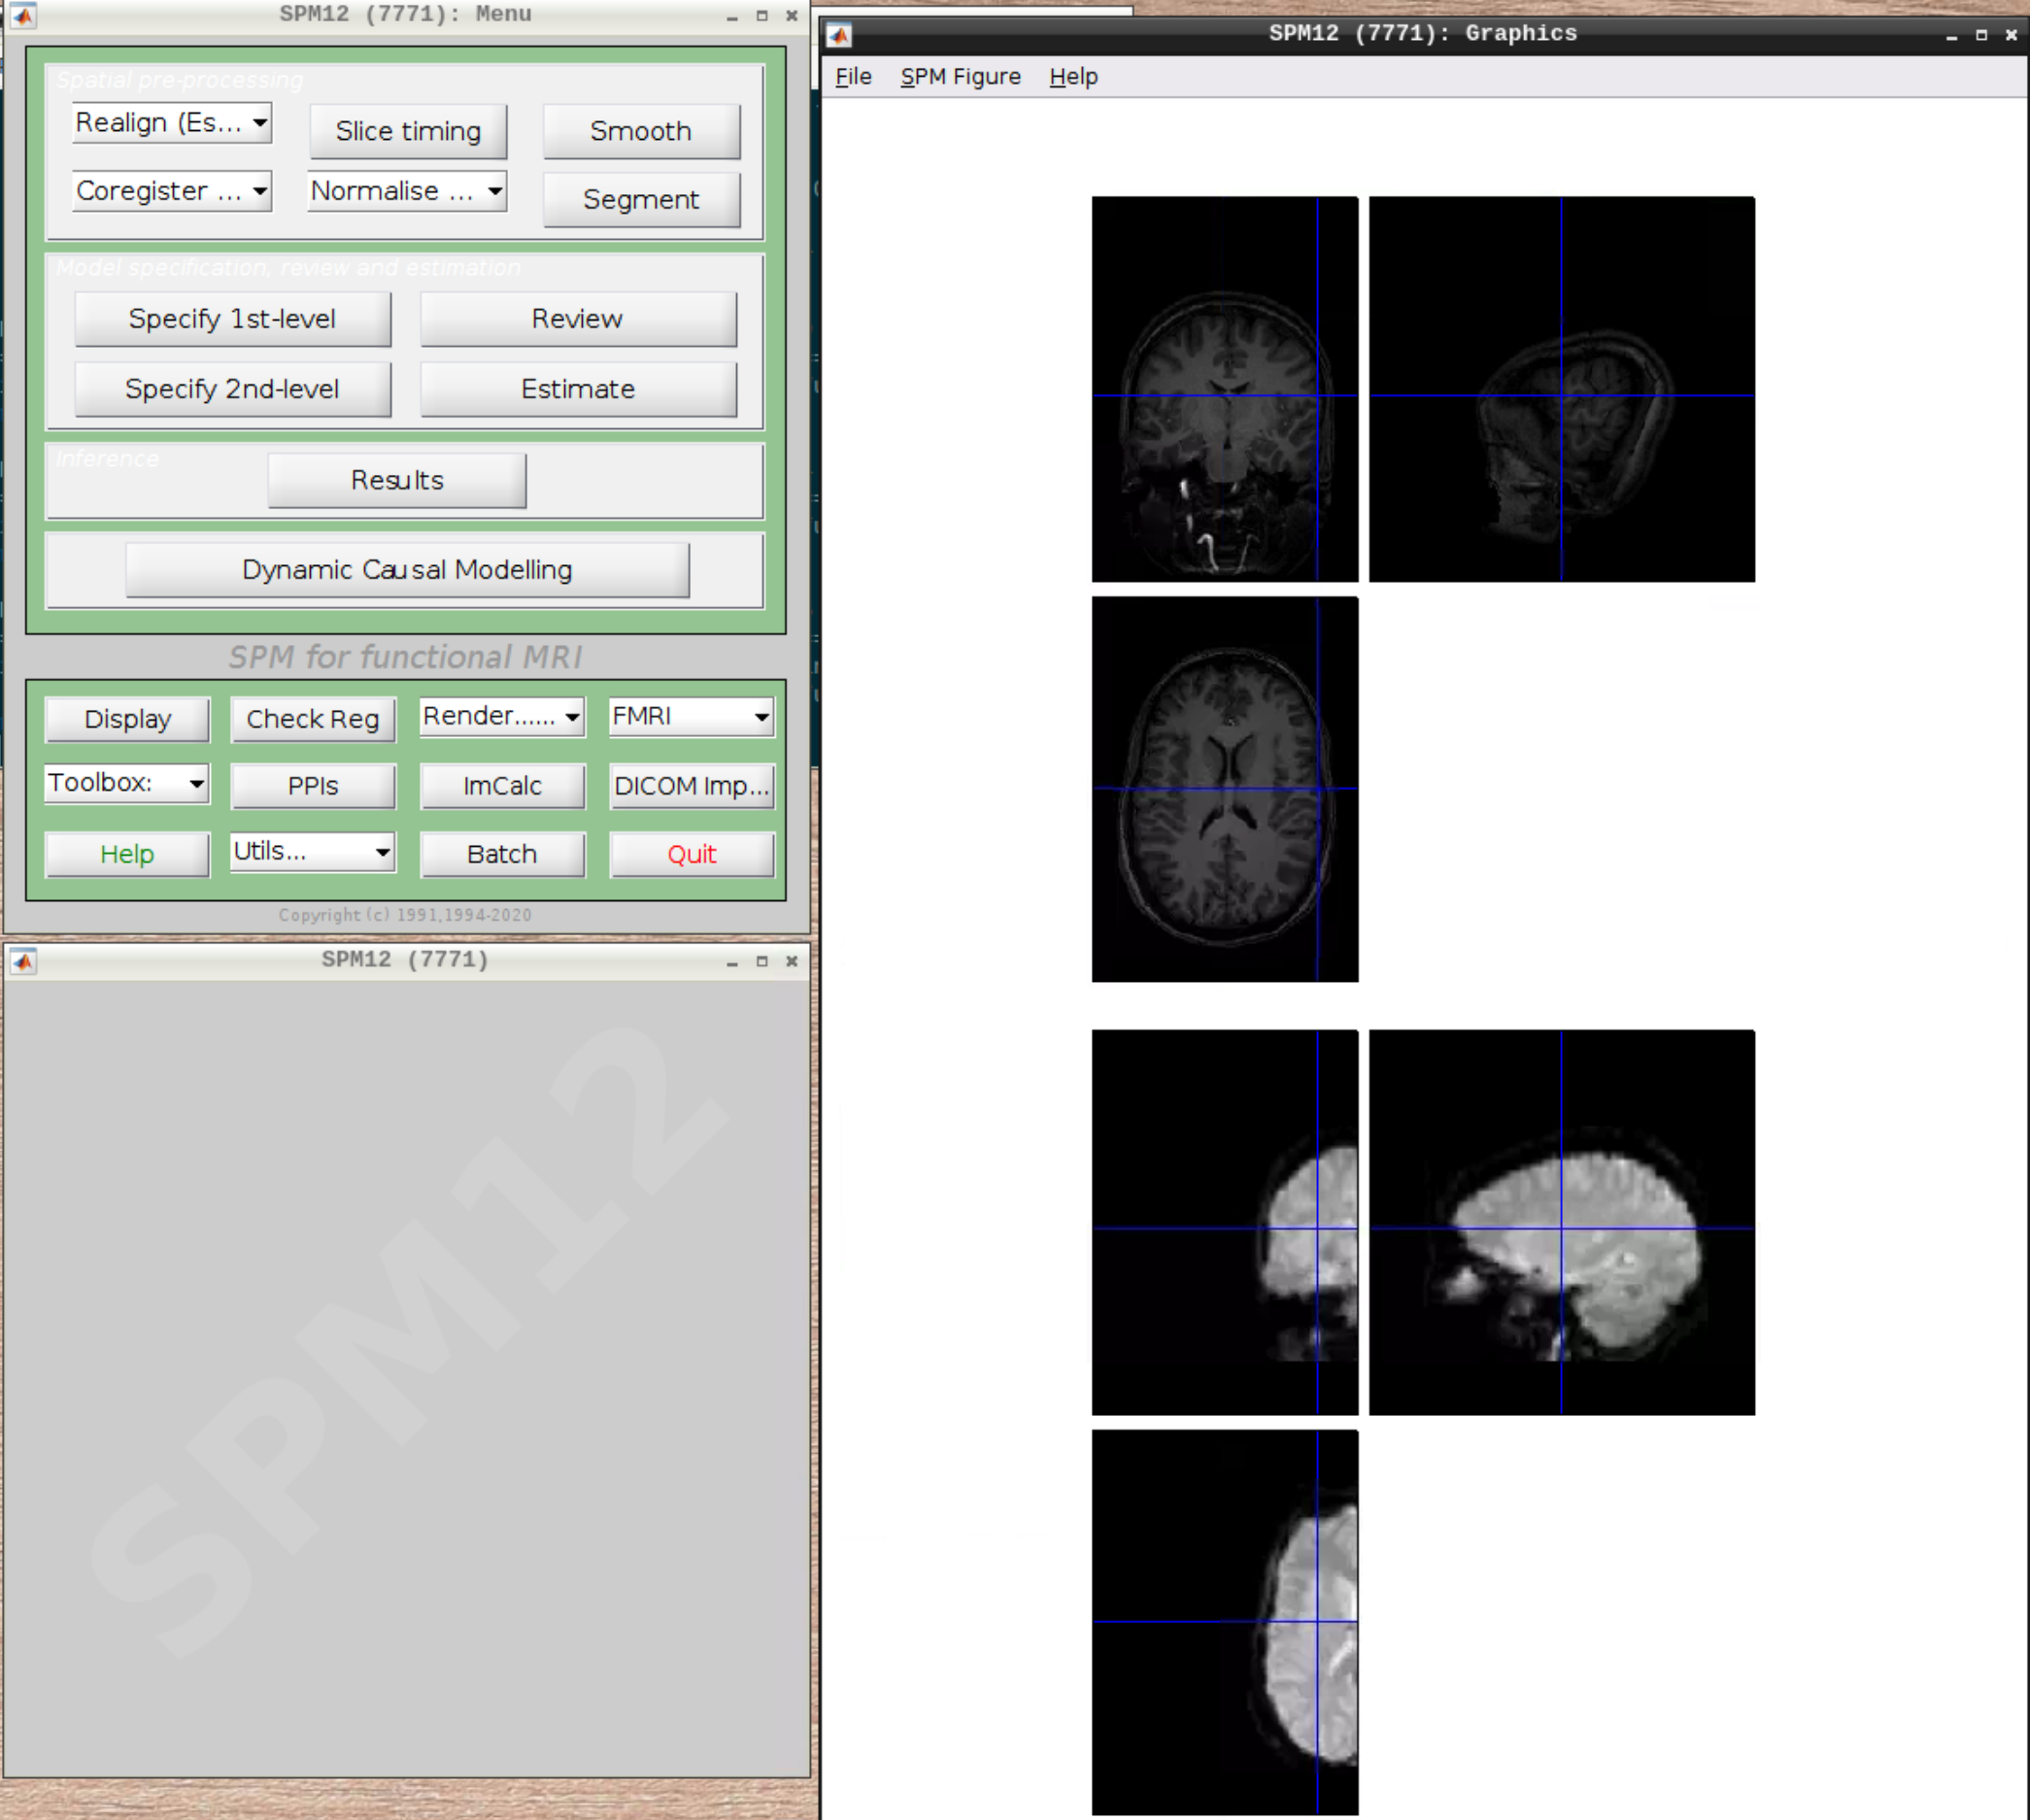
Let’s check the alignment between the anatomical and the functional scans - use CheckReg and open the anatomical and the functional scan. They shouldn’t align yet, because we haven’t done any preprocessing yet:
Preprocessing the data#
Realignment#
Select Realign (Est & Reslice) from the SPM Menu (the third option):
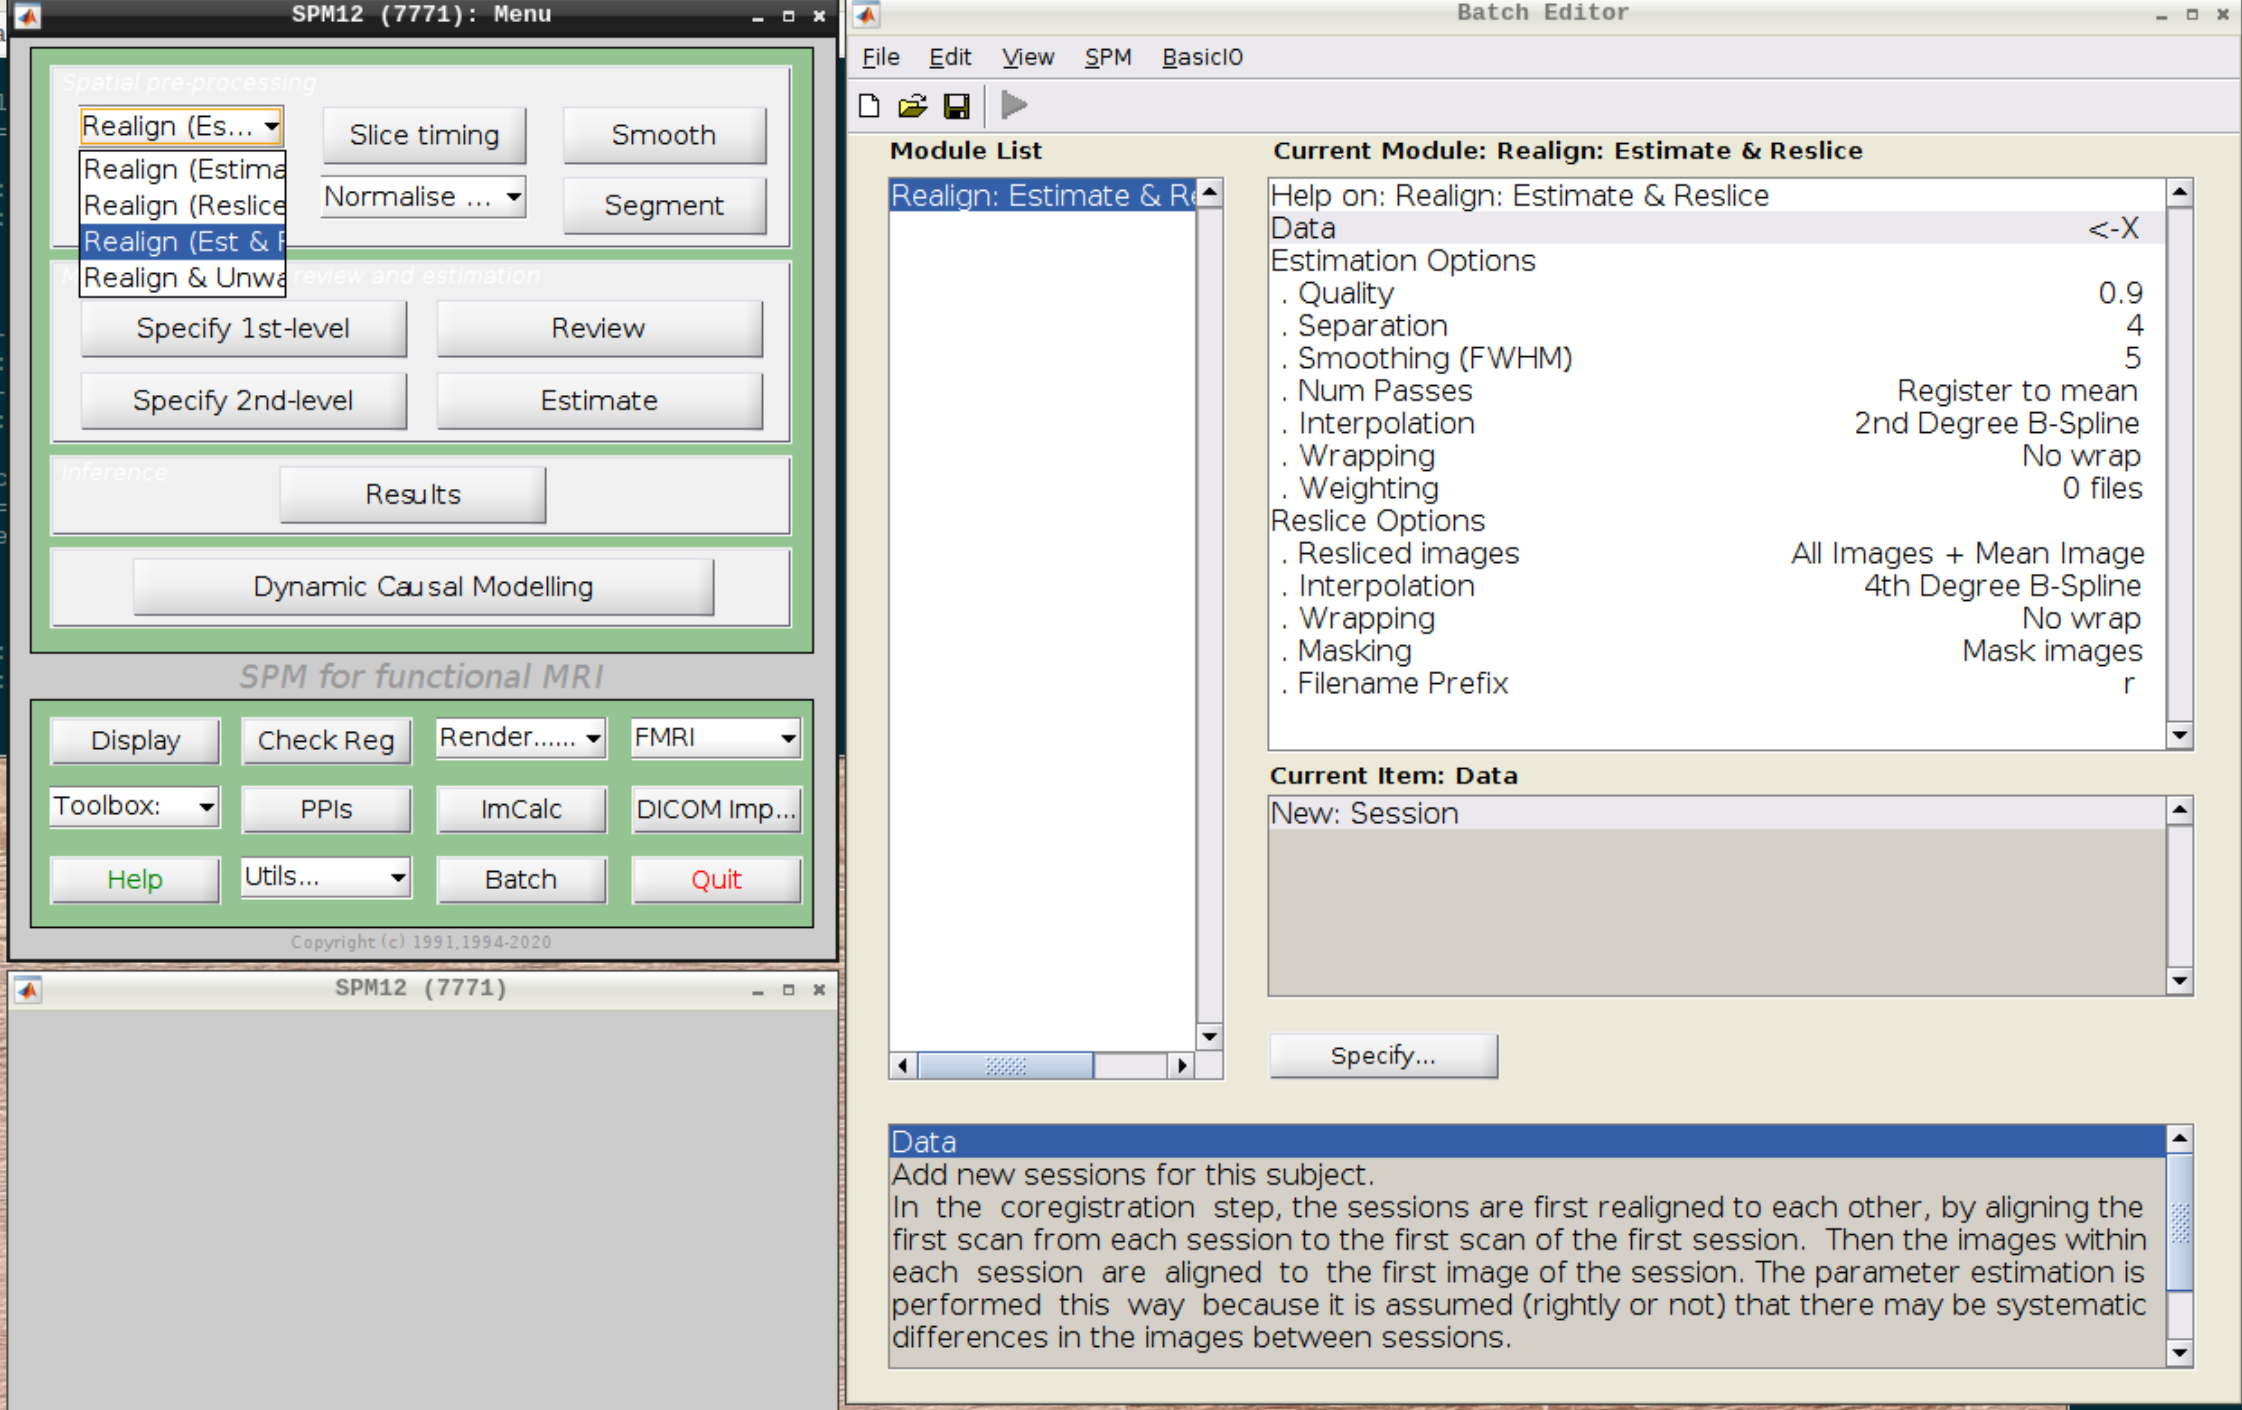
Then select the functional run (important: Select frames from 1:146 again!) and leave everything else as Defaults. Then hit run:
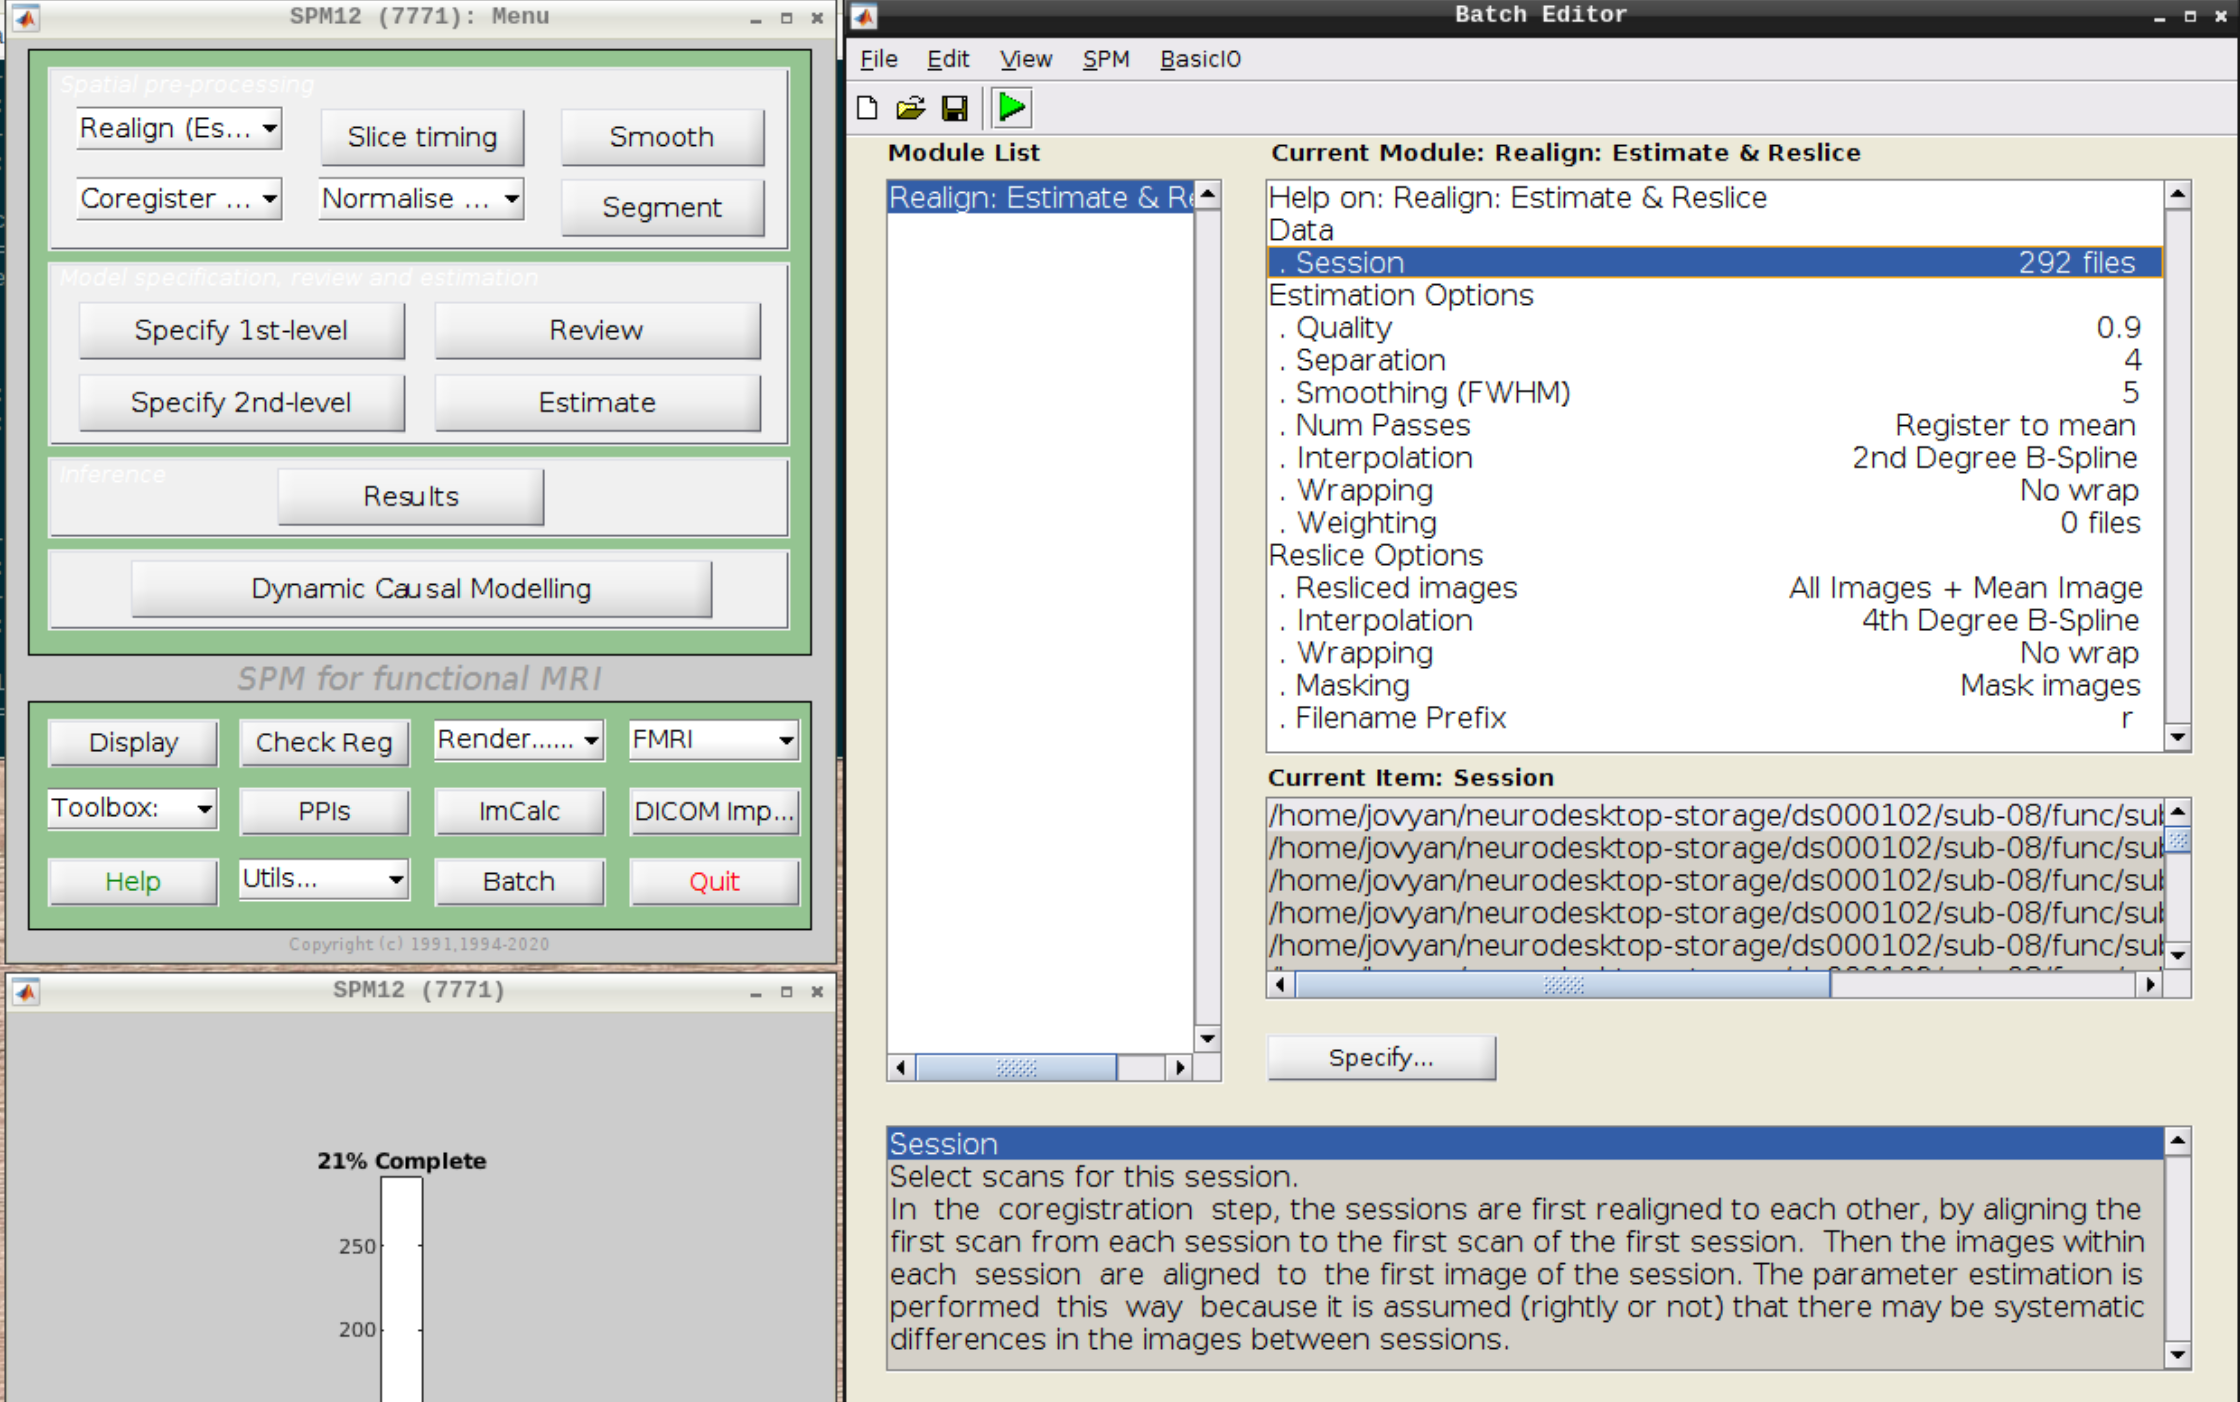
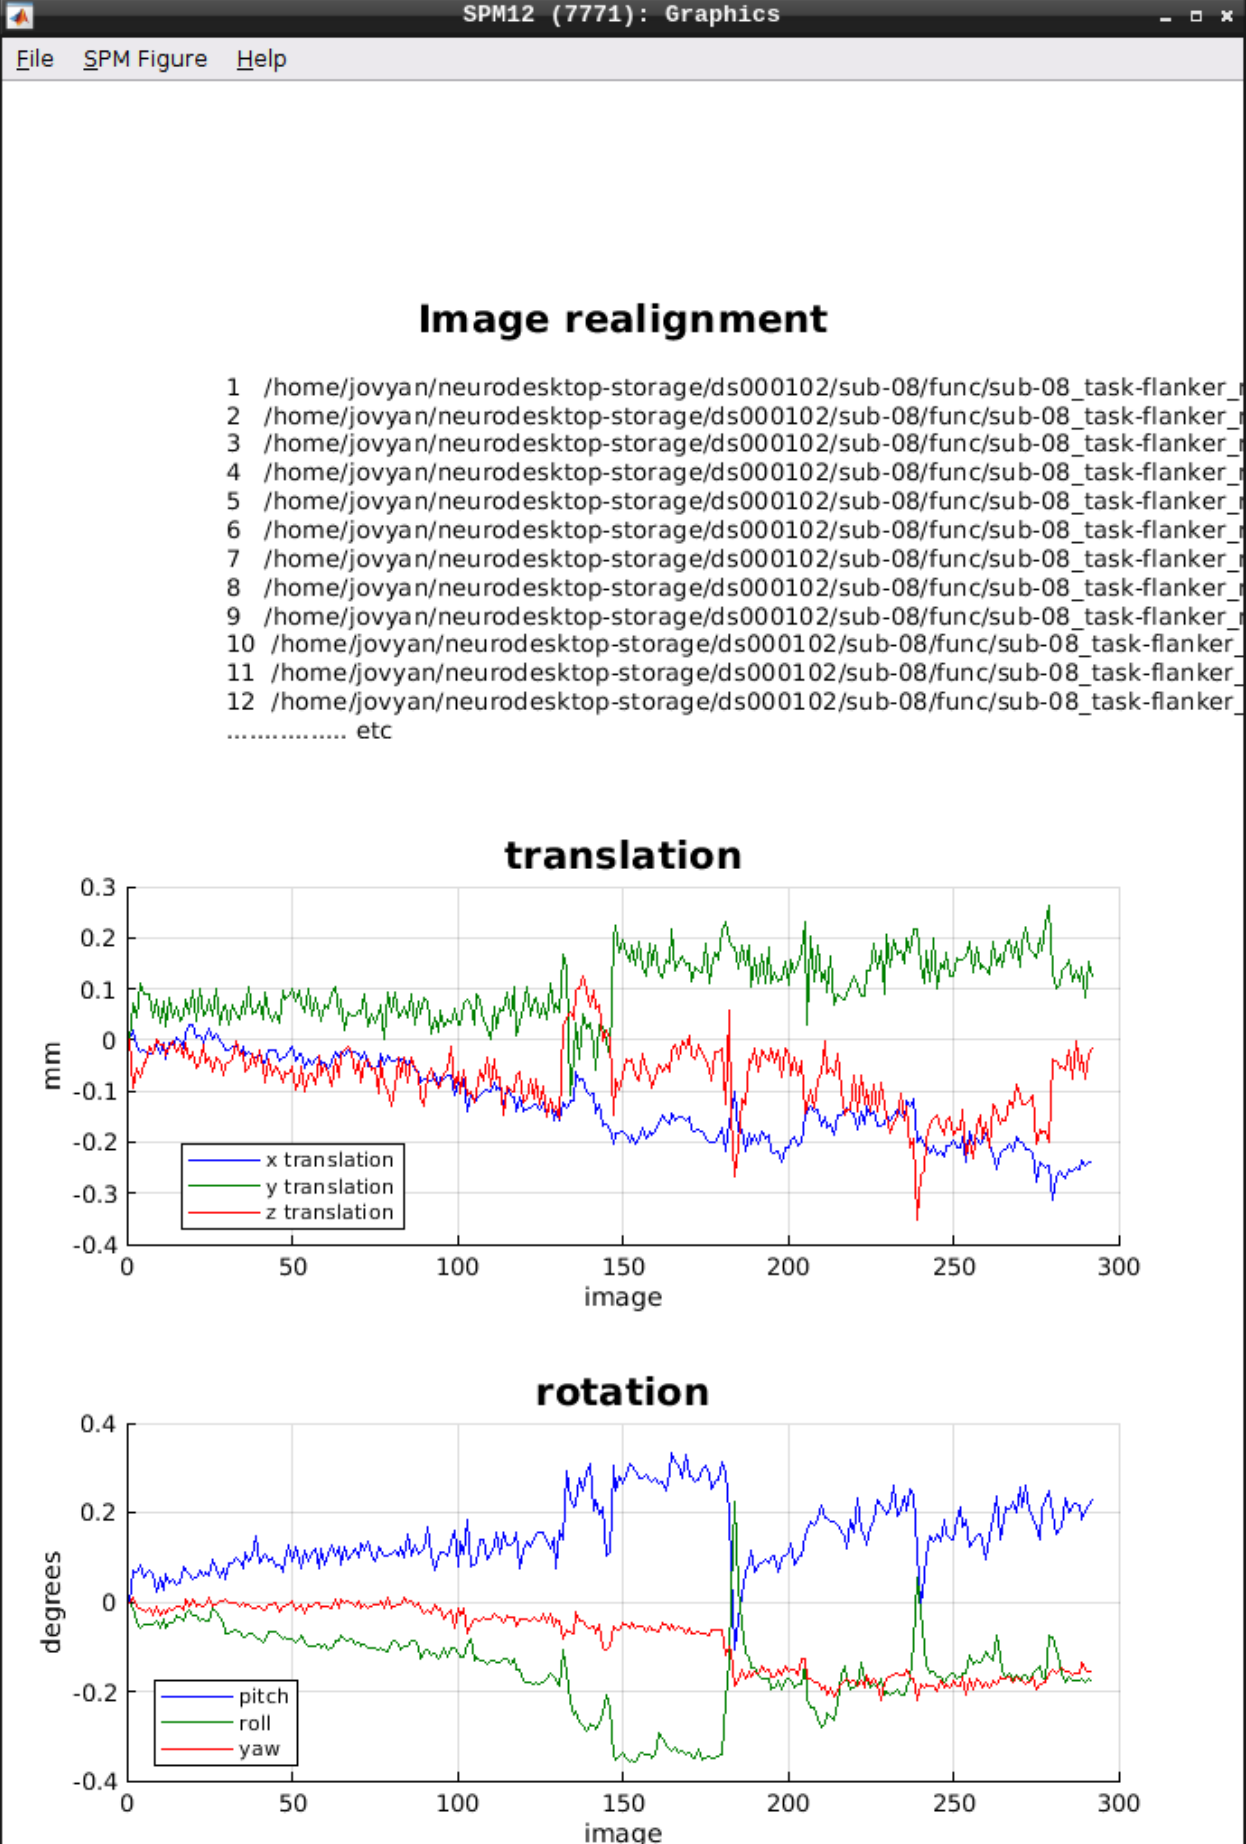
As an output we should see the realignment parameters:
Slice timing correction#
Click on Slice timing in the SPM menu to bring up the Slice Timing section in the batch editor:
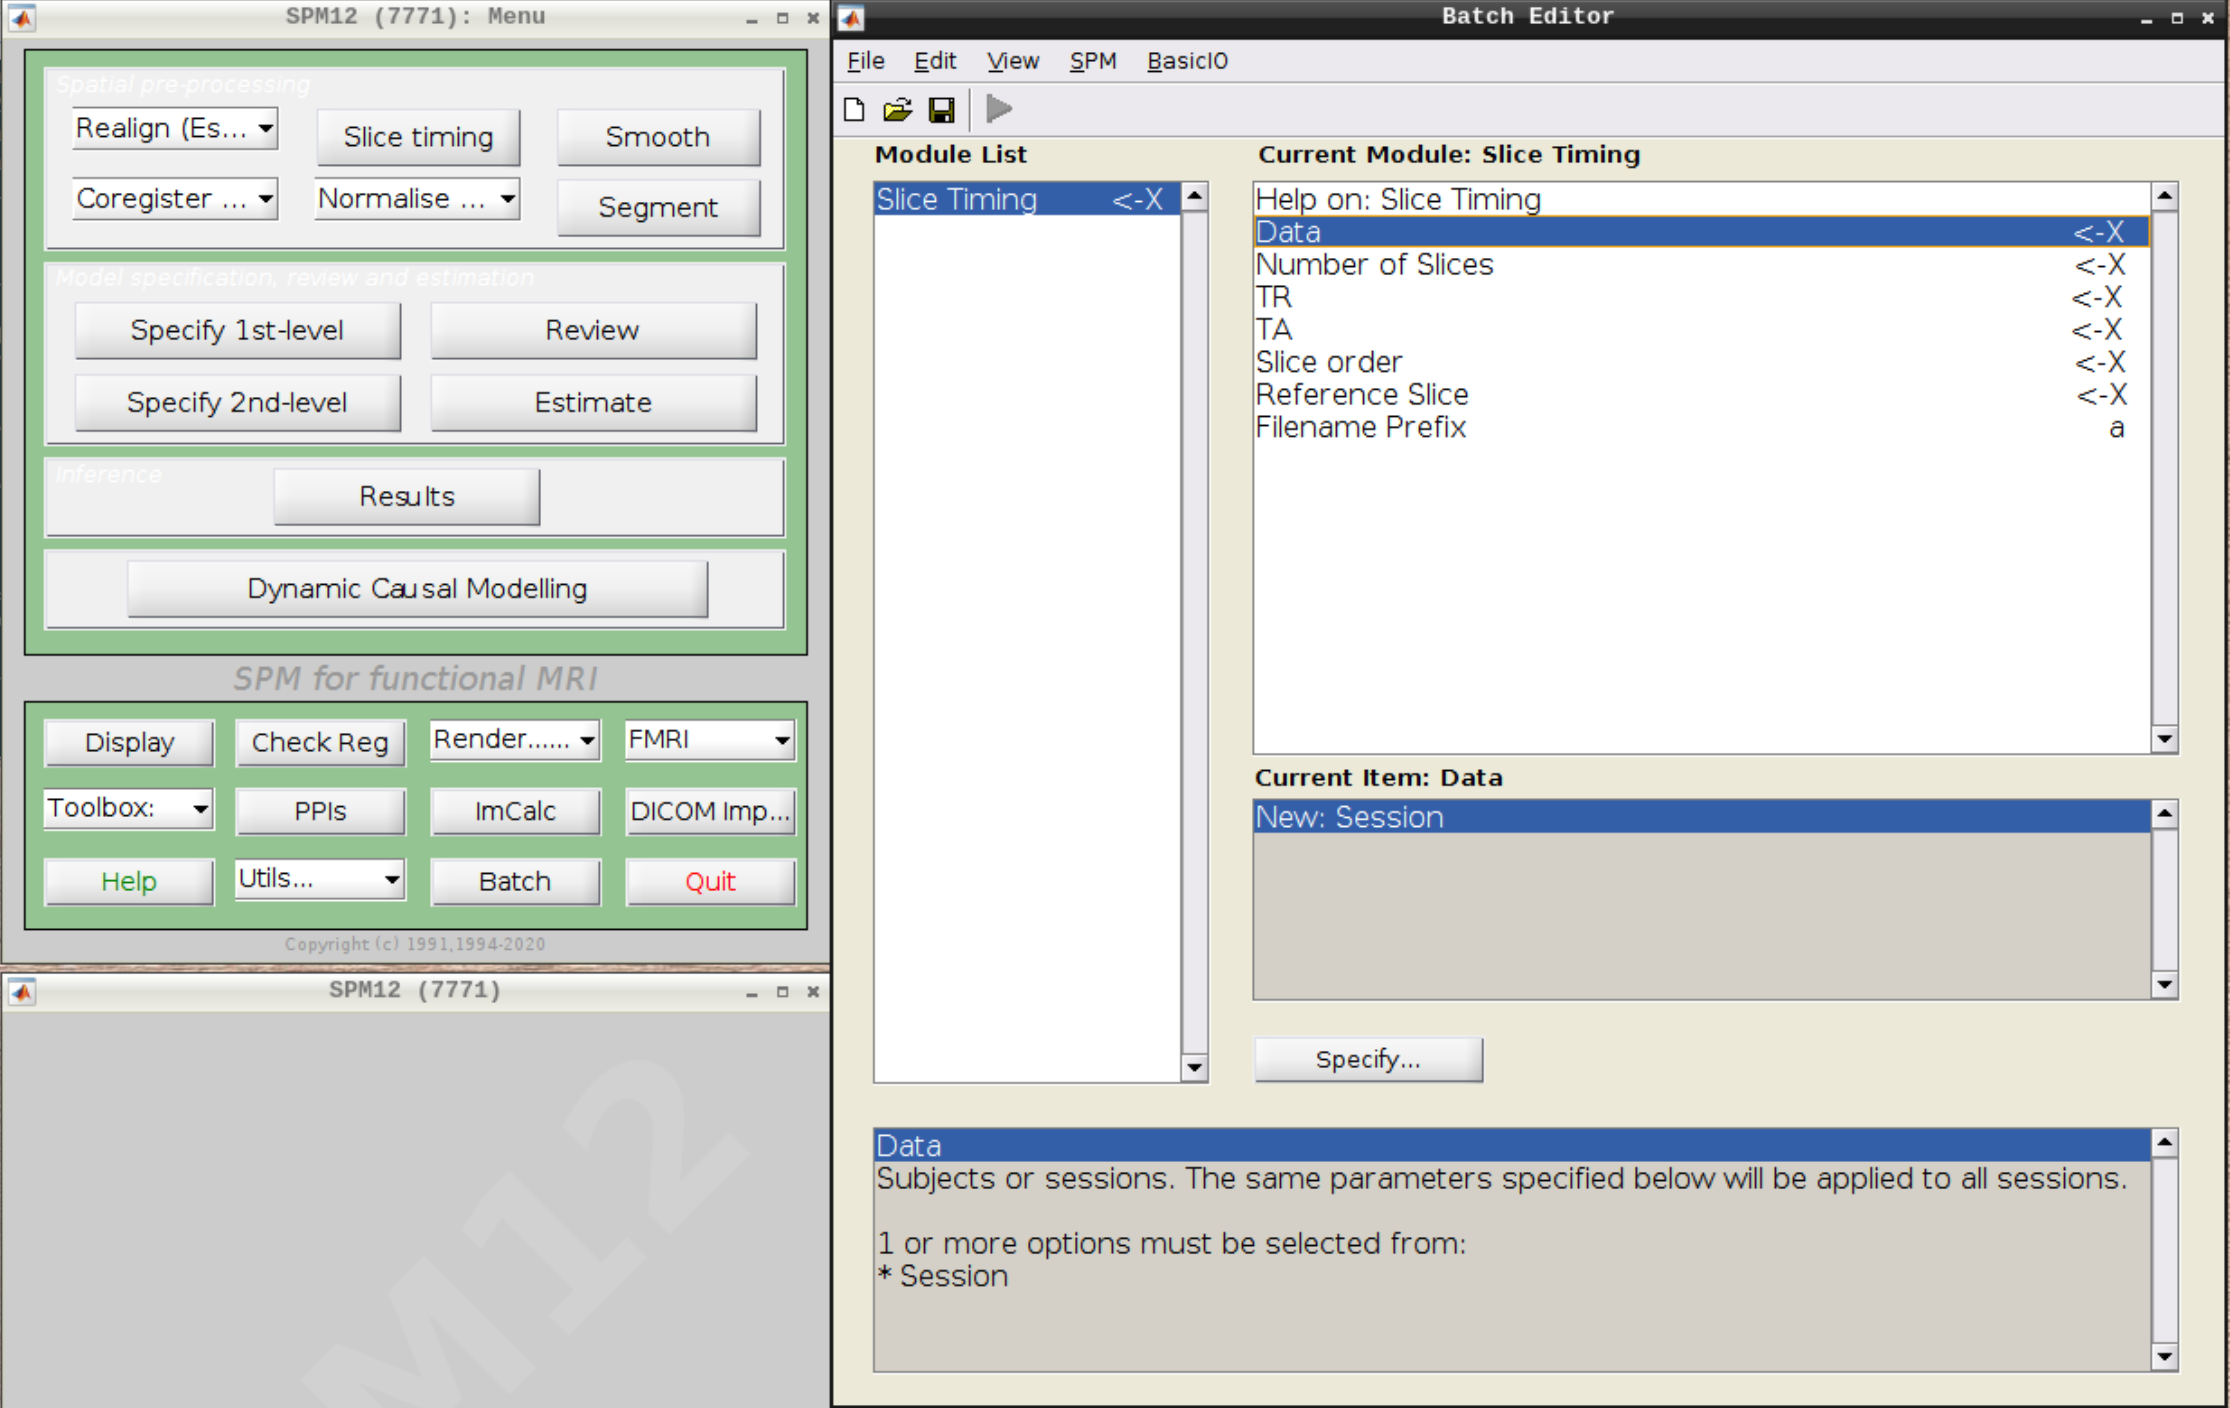
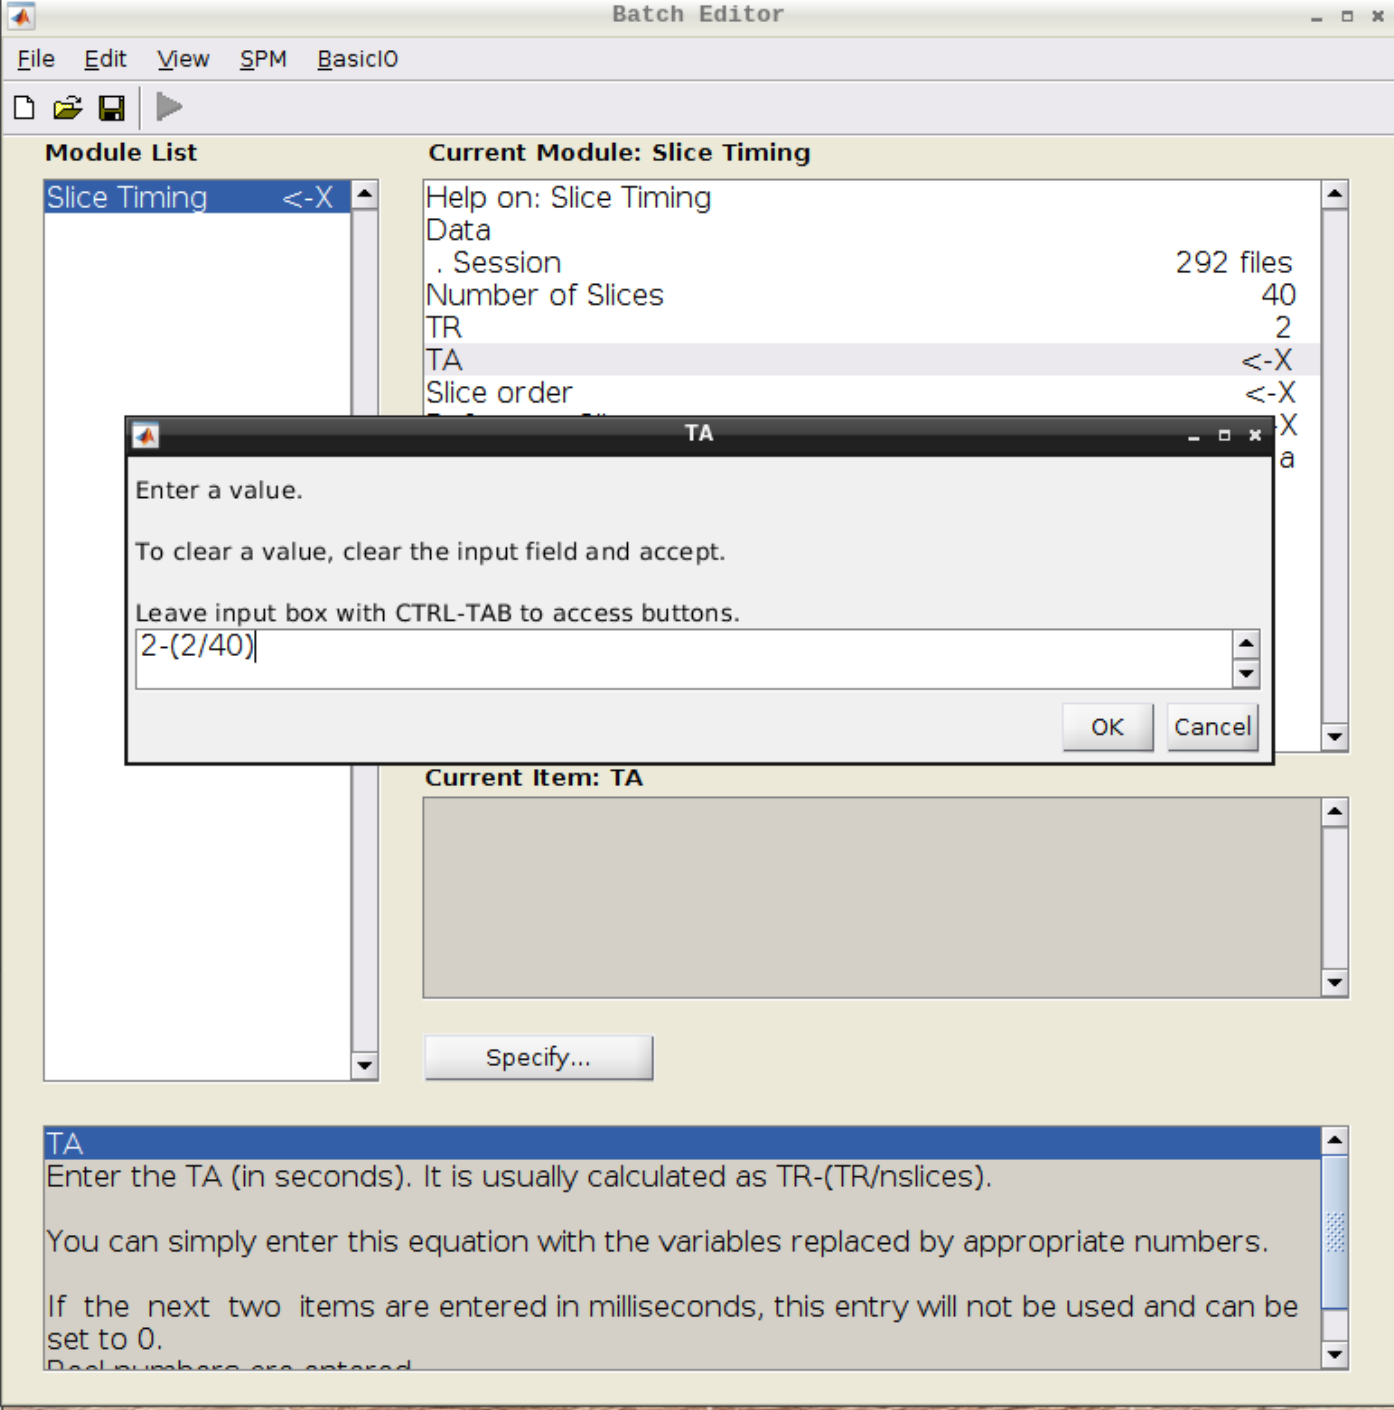
Select the realigned images (use filter rsub and Frames 1:146) and then enter the parameters:
Number of Slices = 40
TR = 2
TA = 1.95
Slice order = [1:2:40 2:2:40]
Reference Slice = 1
Coregistration#
Now, we coregister the functional scans and the anatomical scan.
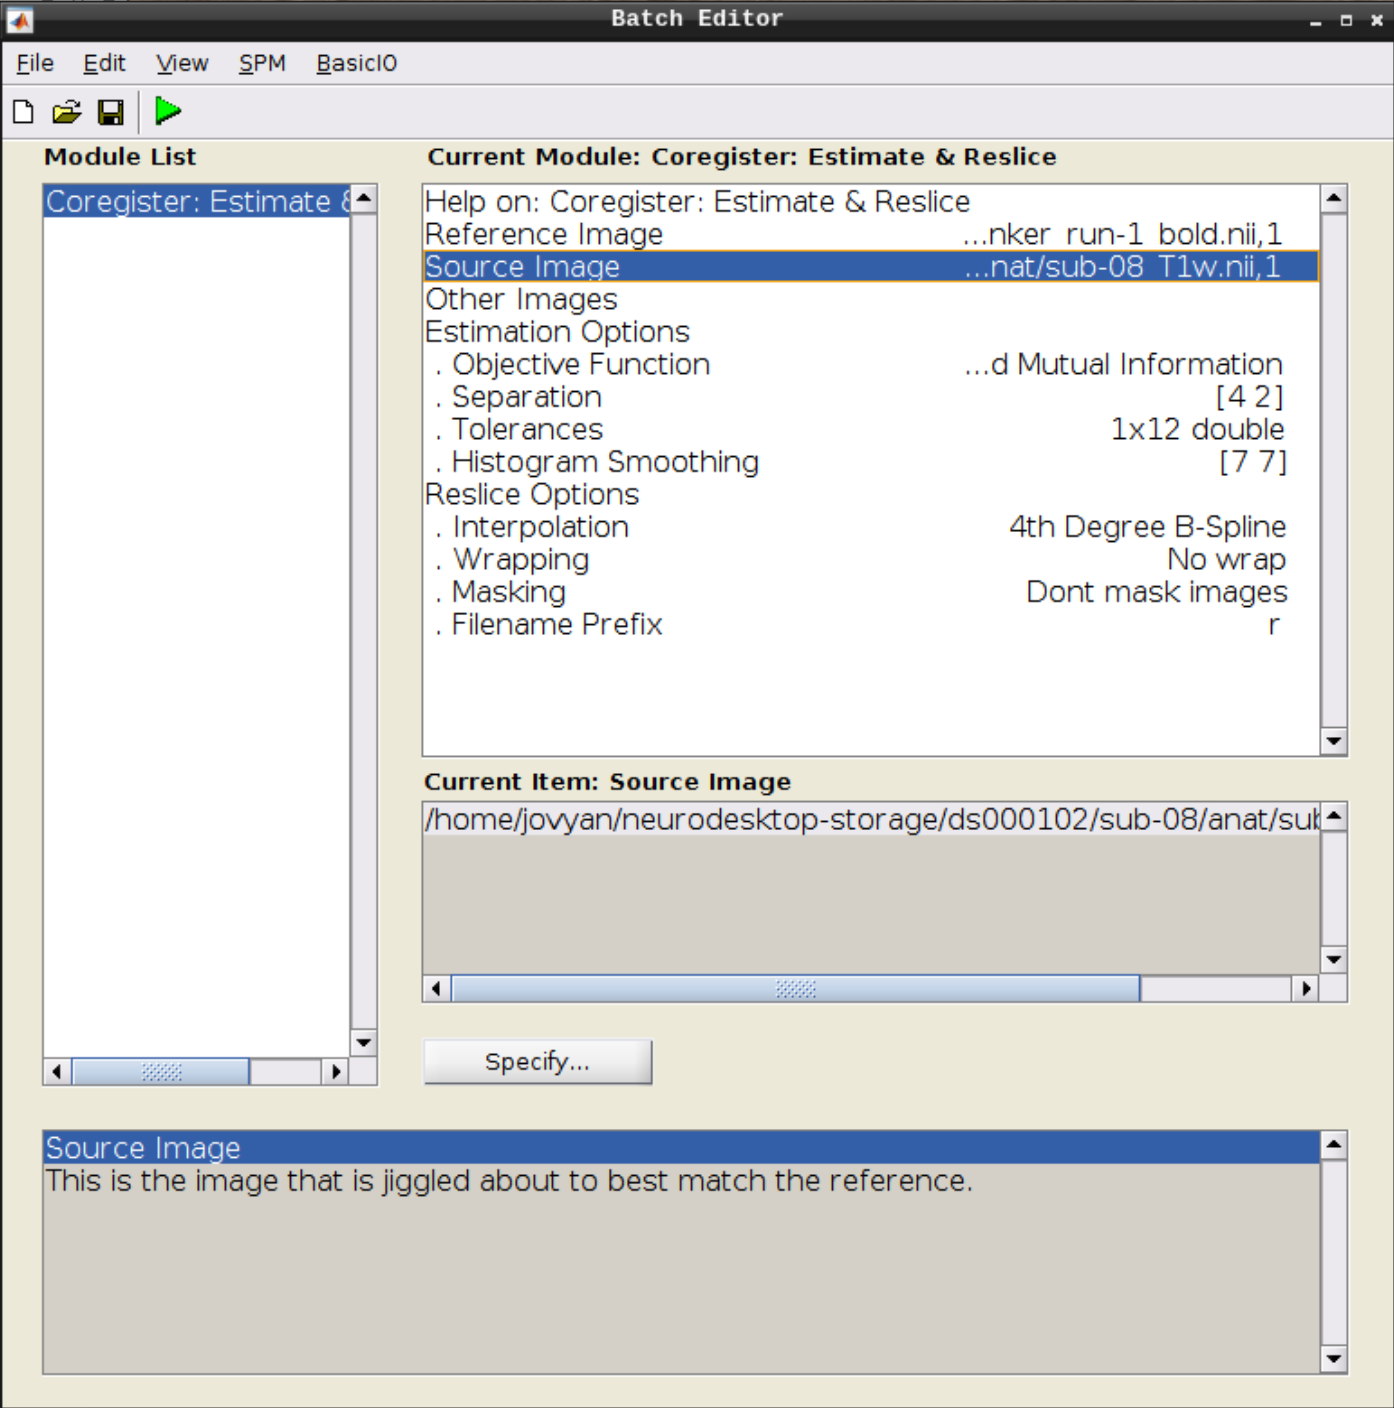
Click on Coregister (Estimate & Reslice) (the third option) in the SPM menu to bring up the batch editor:
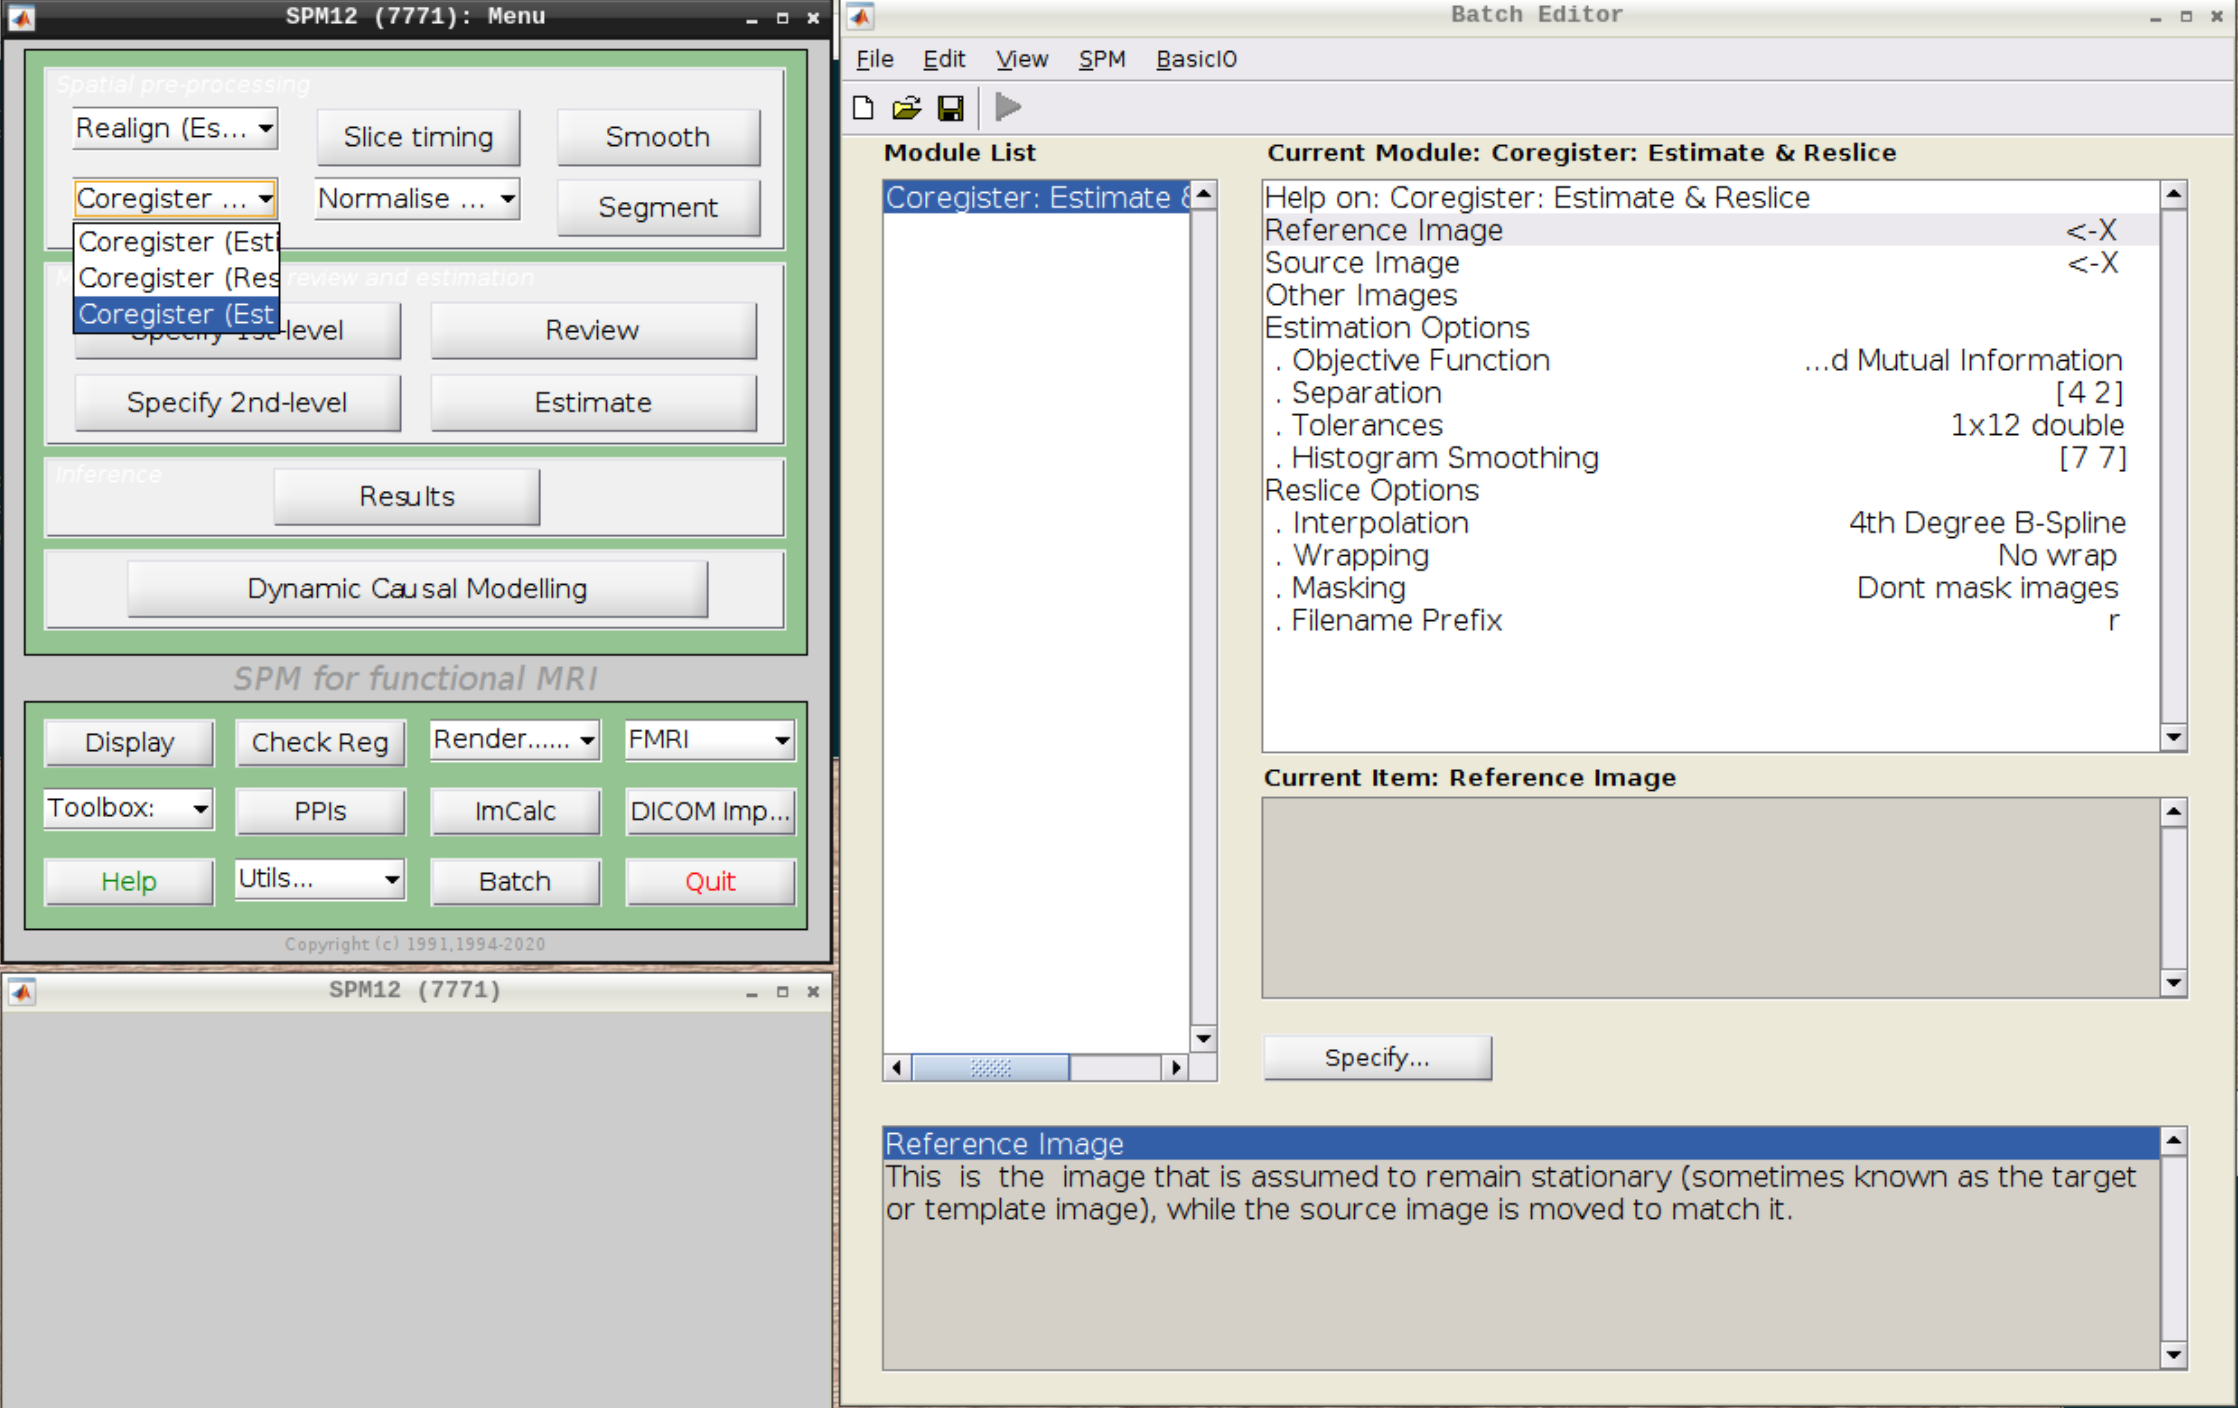
Use the Mean image as the reference and the T1 scan as the source image and hit Play:
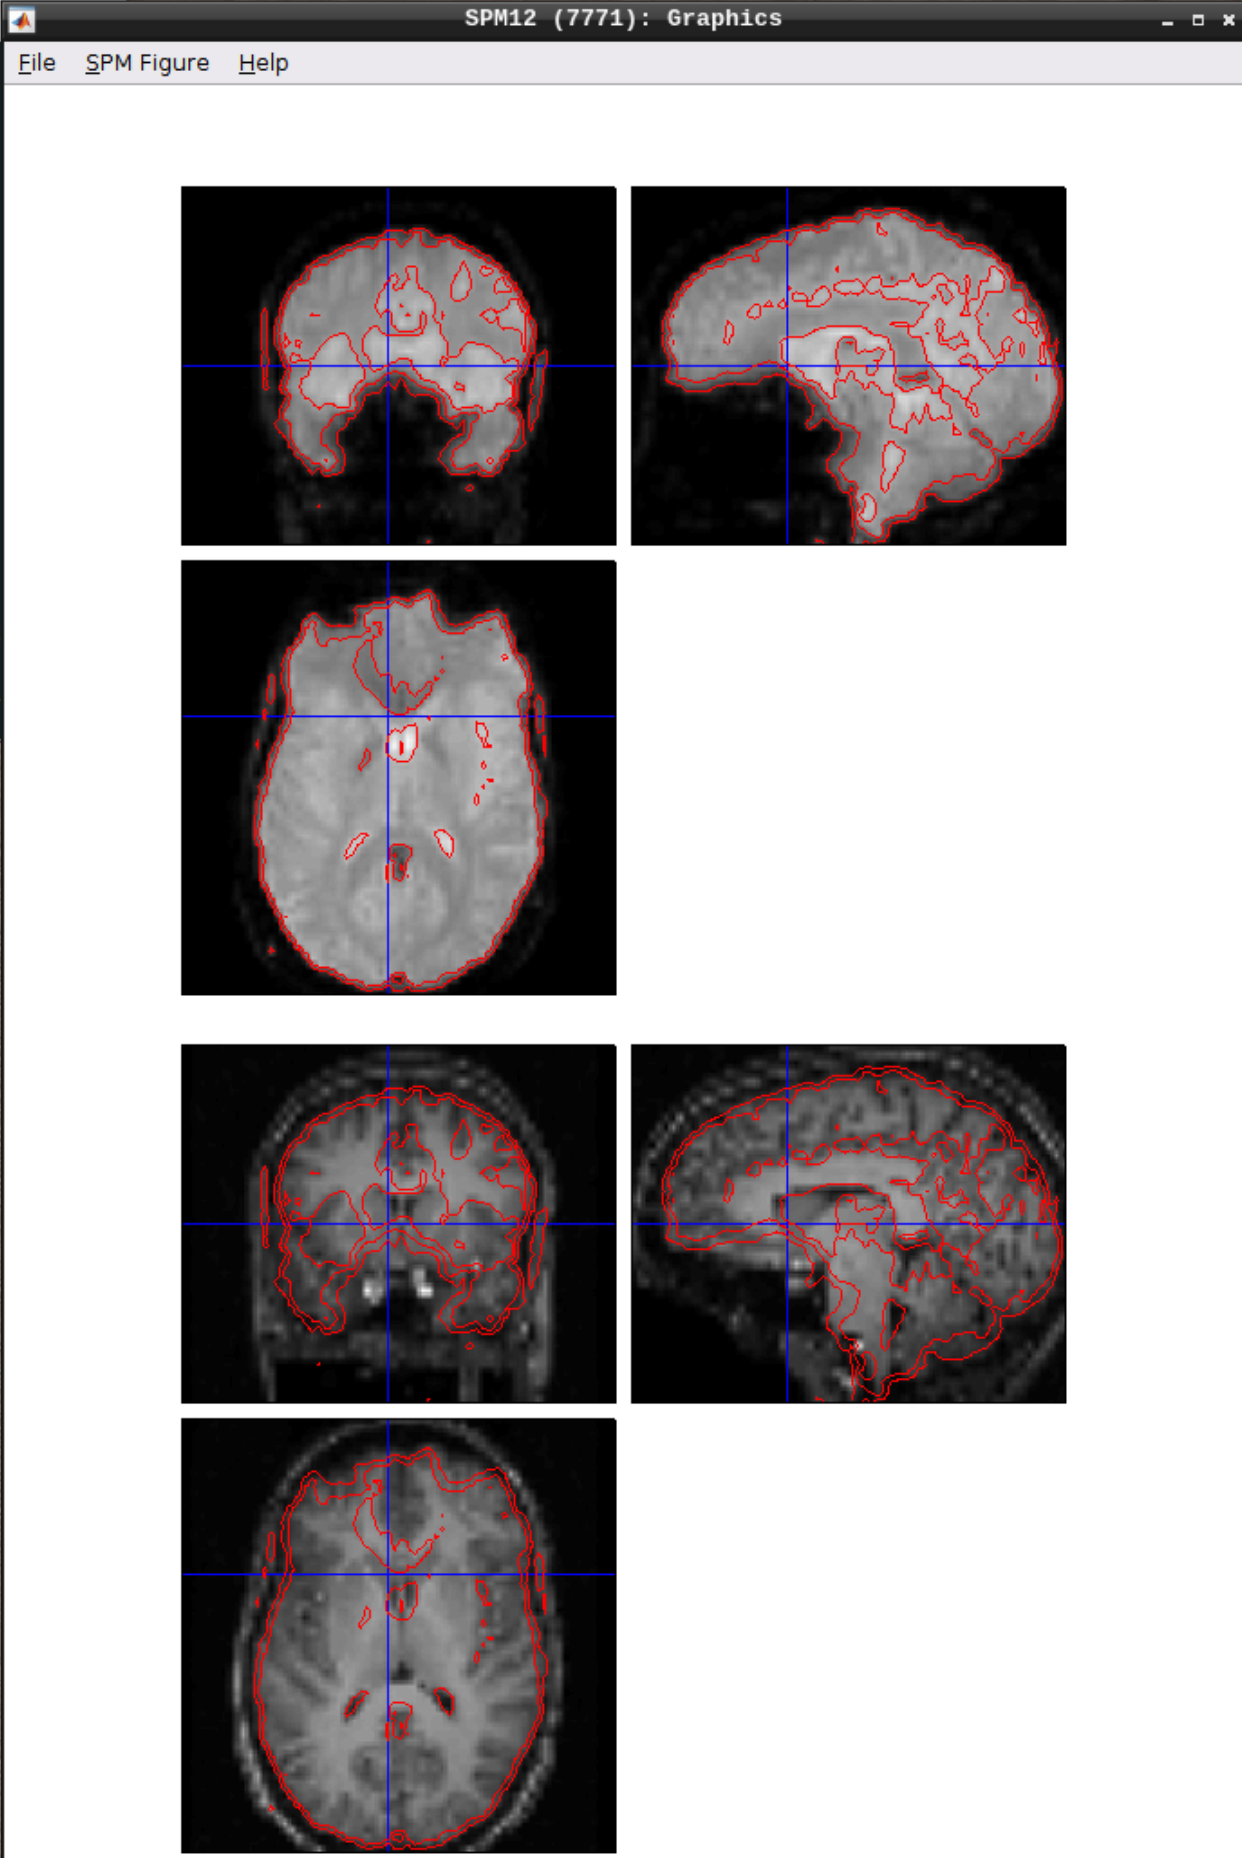
Let’s use CheckReg again and overlay a Contour (Right Click -> Contour -> Display onto -> all) to check the coregistration between the images:
Segmentation#
Click the Segmentation button in the SPM menu:
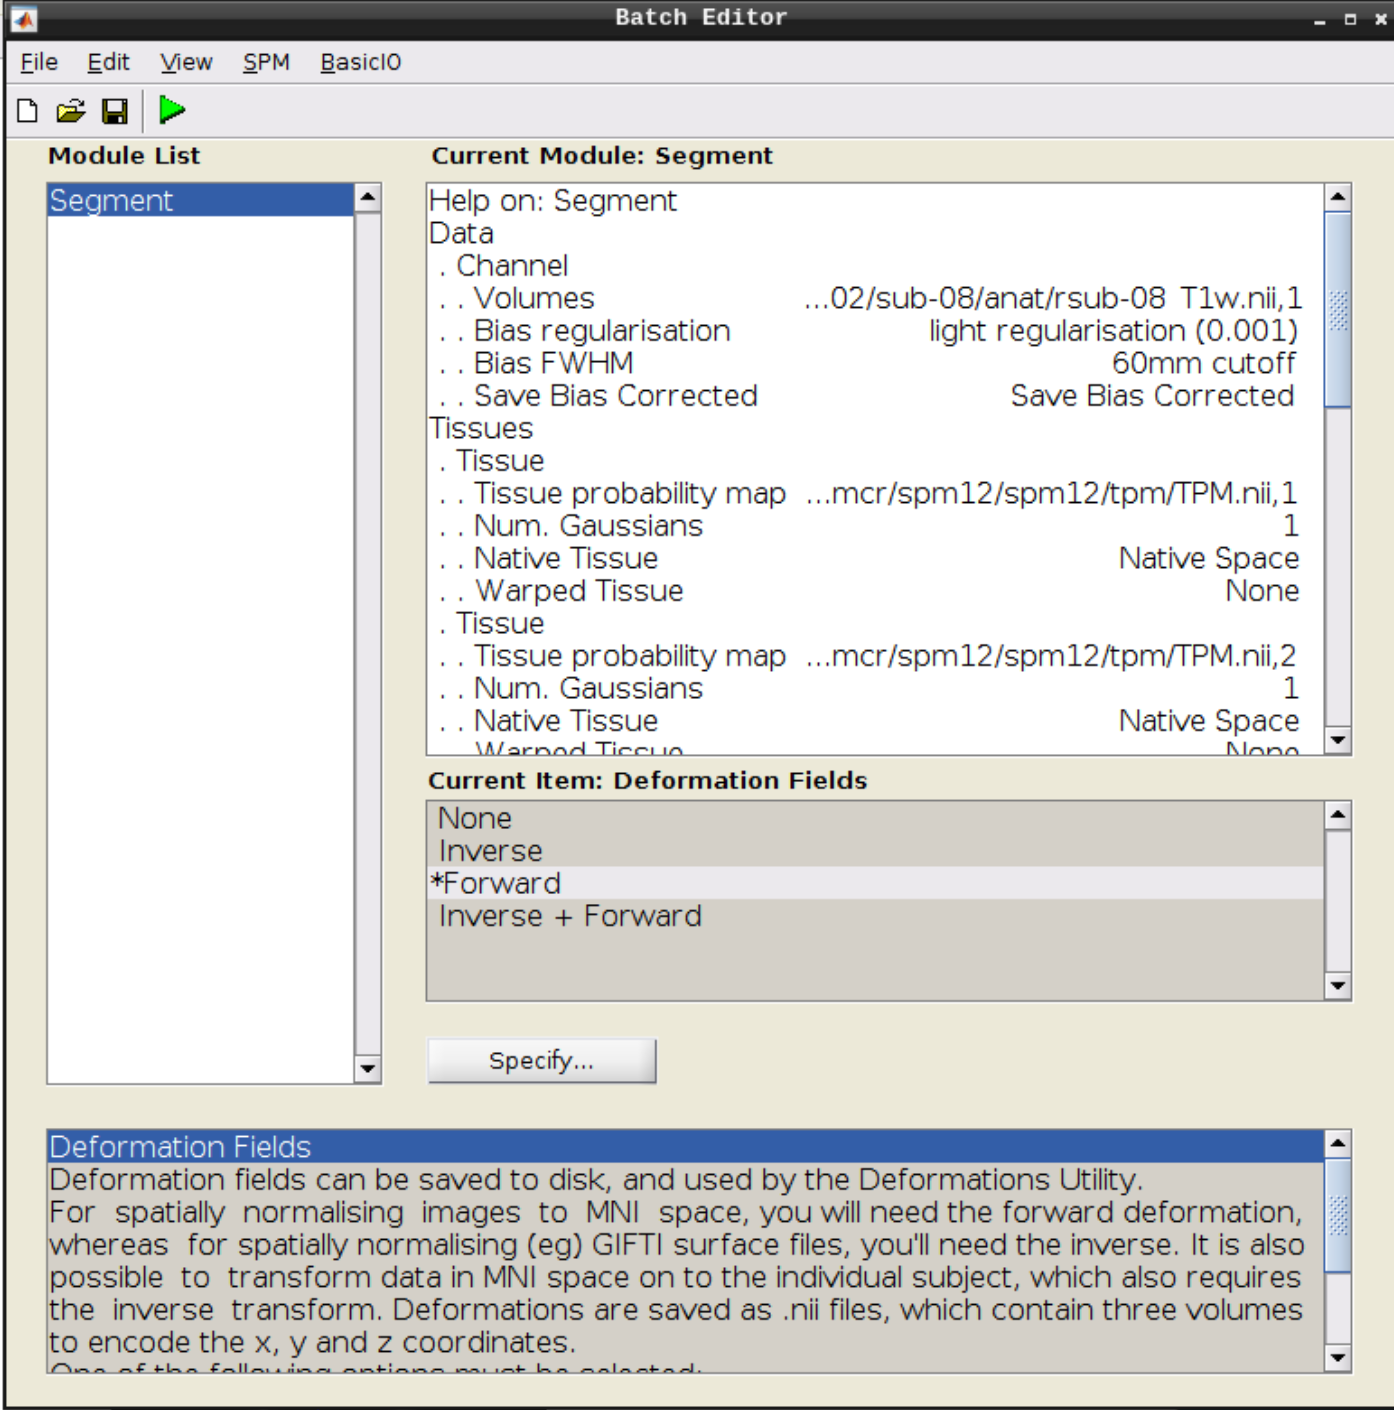
Then change the following settings:
Volumes = our coregistered anatomical scan rsub-08-T1w.nii
Save Bias Corrected = Save Bias Correced
Deformation Fields = Forward
and hit Play again.
Apply normalization#
Select Normalize (Write) from the SPM menu:
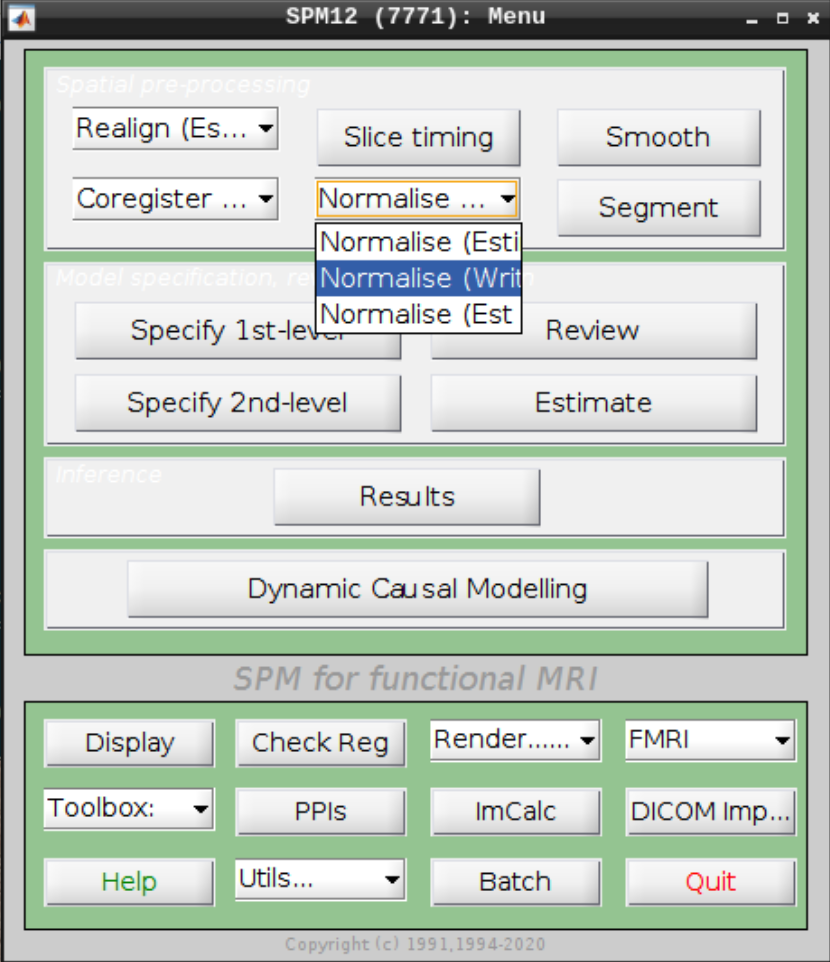
For the Deformation Field select the y_rsub-08 file we created in the last step and for the Images to Write select the arsub-08 functional images (Filter ^ar and Frames 1:146):
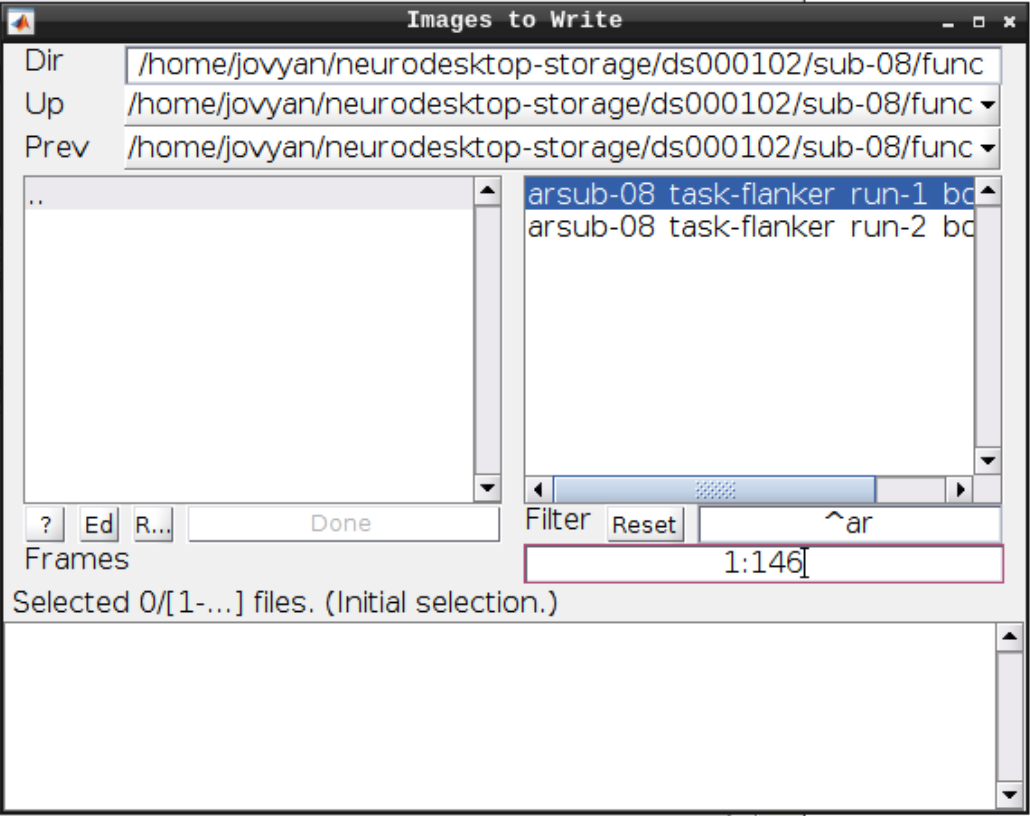
Hit Play again.
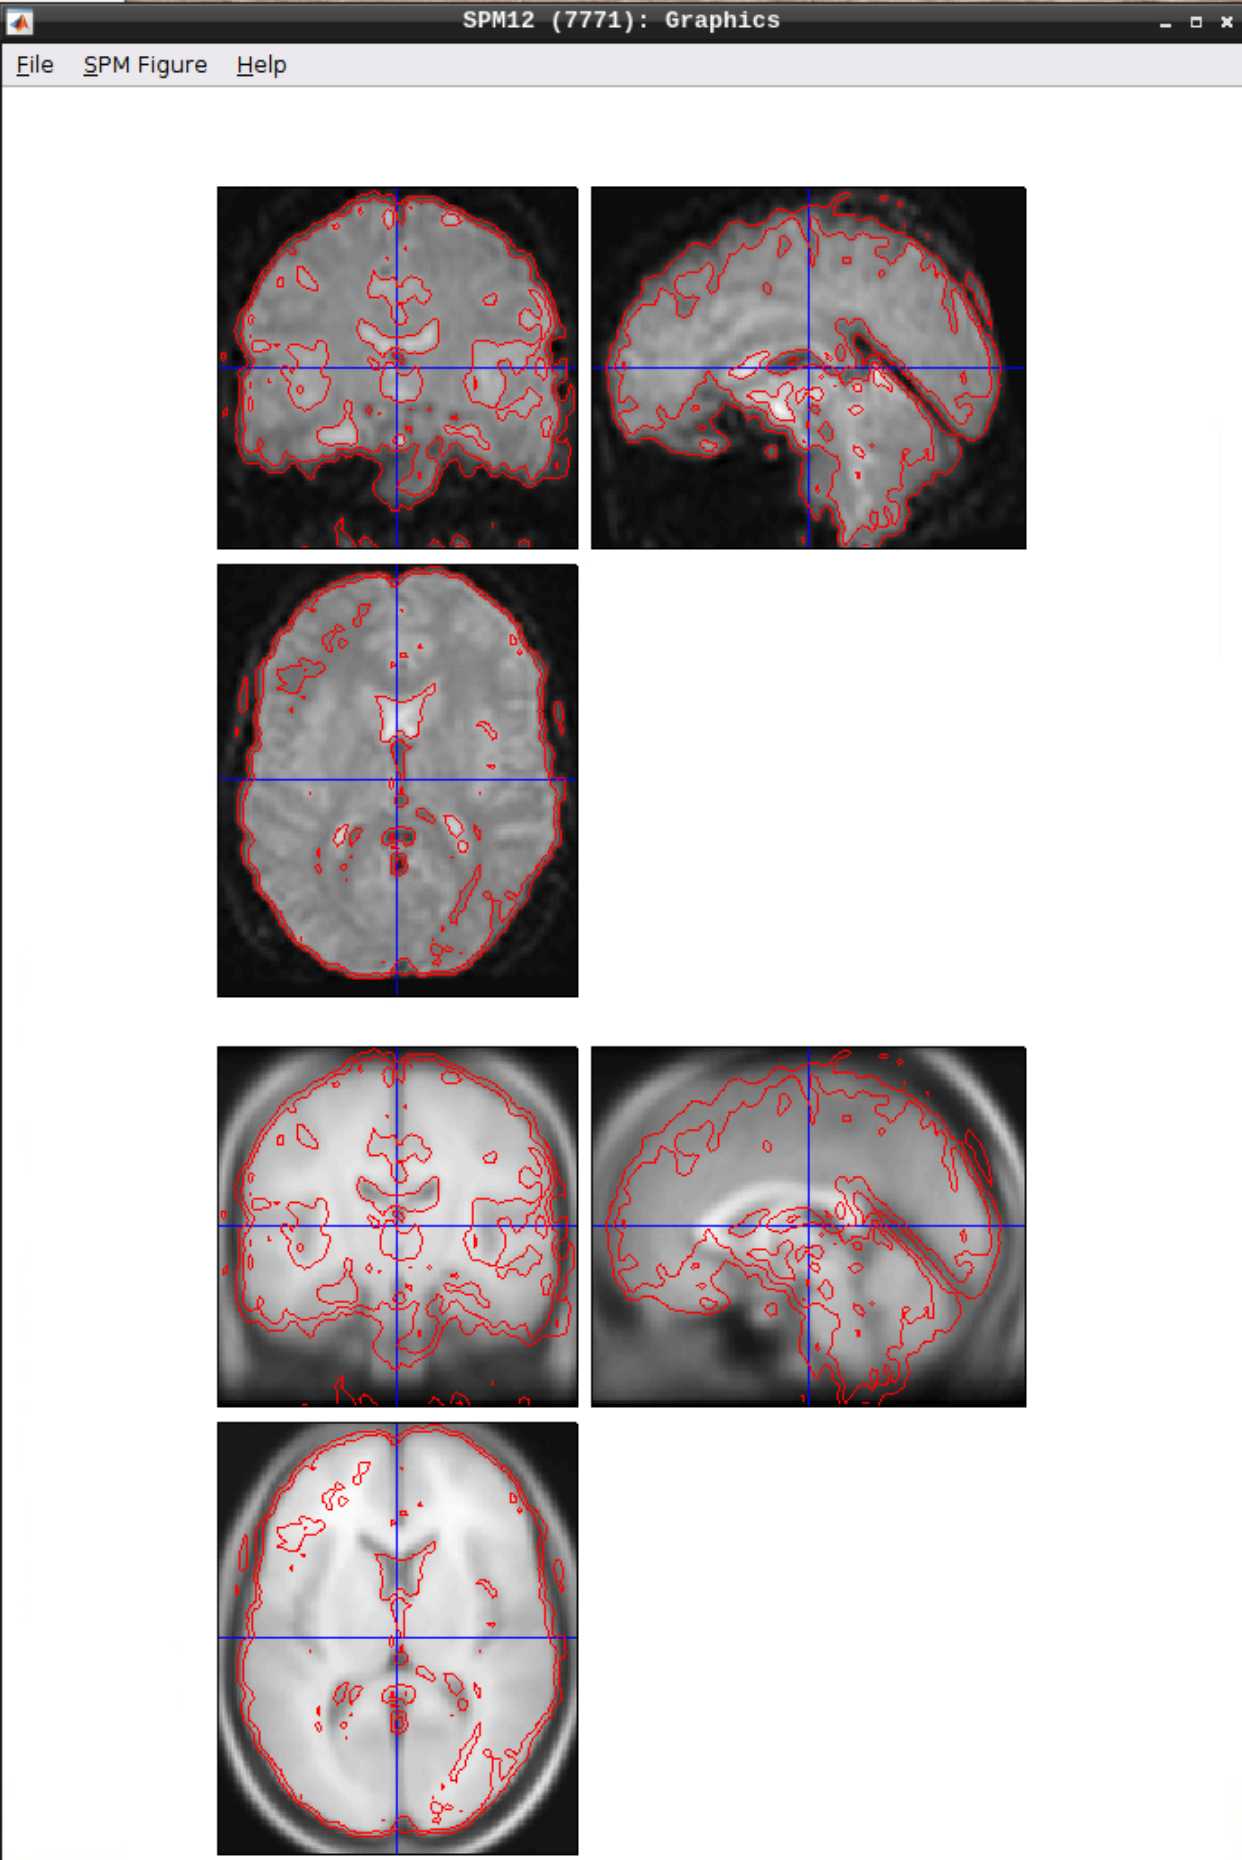
Checking the normalization#
Use CheckReg to make sure that the functional scans (starting with w to indicate that they were warped: warsub-08) align with the template (found in /opt/spm12/spm12_mcr/spm12/spm12/canonical/avg305T1.nii):
Smoothing#
Click the Smooth button in the SPM menu and select the warped functional scans:
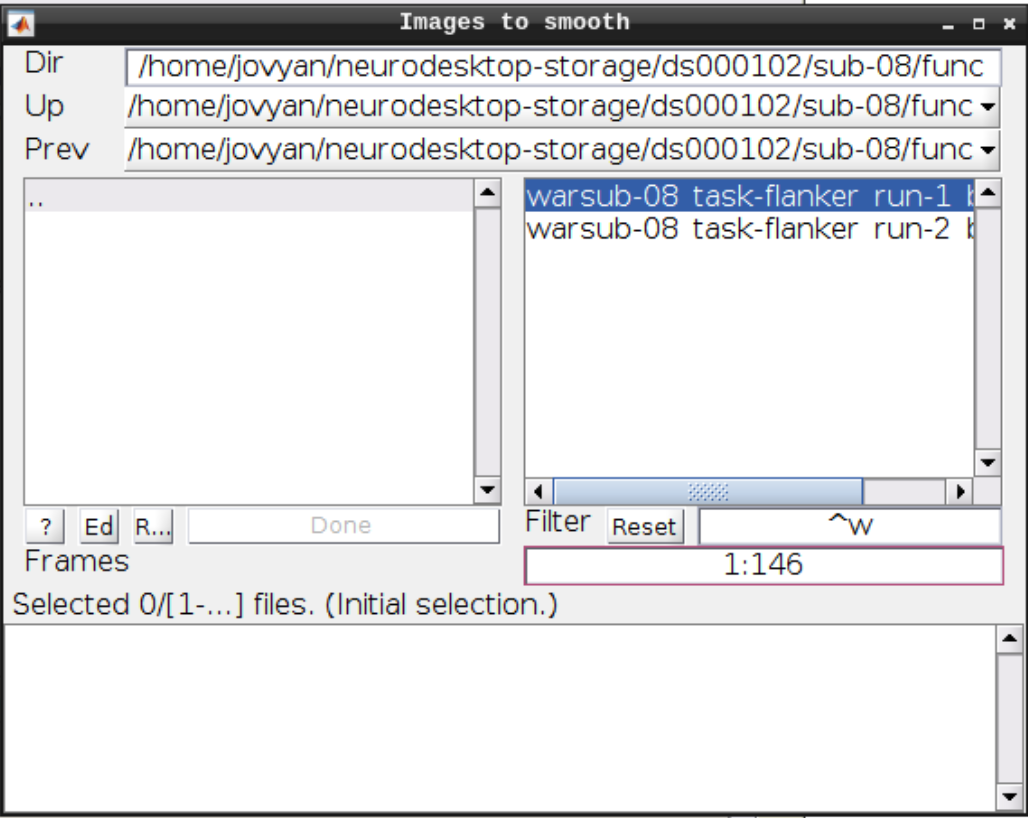
Then click Play.
You can check the smoothing by using CheckReg again:
Analyzing the data#
Click on Specify 1st-level - then set the following options:
Directory: Select the sub-08 top level directory
Units for design: Seconds
Interscan interval: 2
Data & Design: Click twice on New Subject/Session
Select the smoothed, warped data from run 1 and run 2 for the two sessions respectively
Create two Conditions per run and set the following:
For Run 1:
Name: Inc
Onsets (you can copy from here and paste with CTRL-V): 0 10 20 52 88 130 144 174 236 248 260 274
Durations: 2 (SPM will assume that it’s the same for each event)
Name: Con
Onsets: 32 42 64 76 102 116 154 164 184 196 208 222
Durations: 2
For Run 2:
Name: Inc
Onsets: 0 10 52 64 88 150 164 174 184 196 232 260
Durations: 2
Name: Con
Onsets: 20 30 40 76 102 116 130 140 208 220 246 274
Durations: 2
When done, click the green Play button.
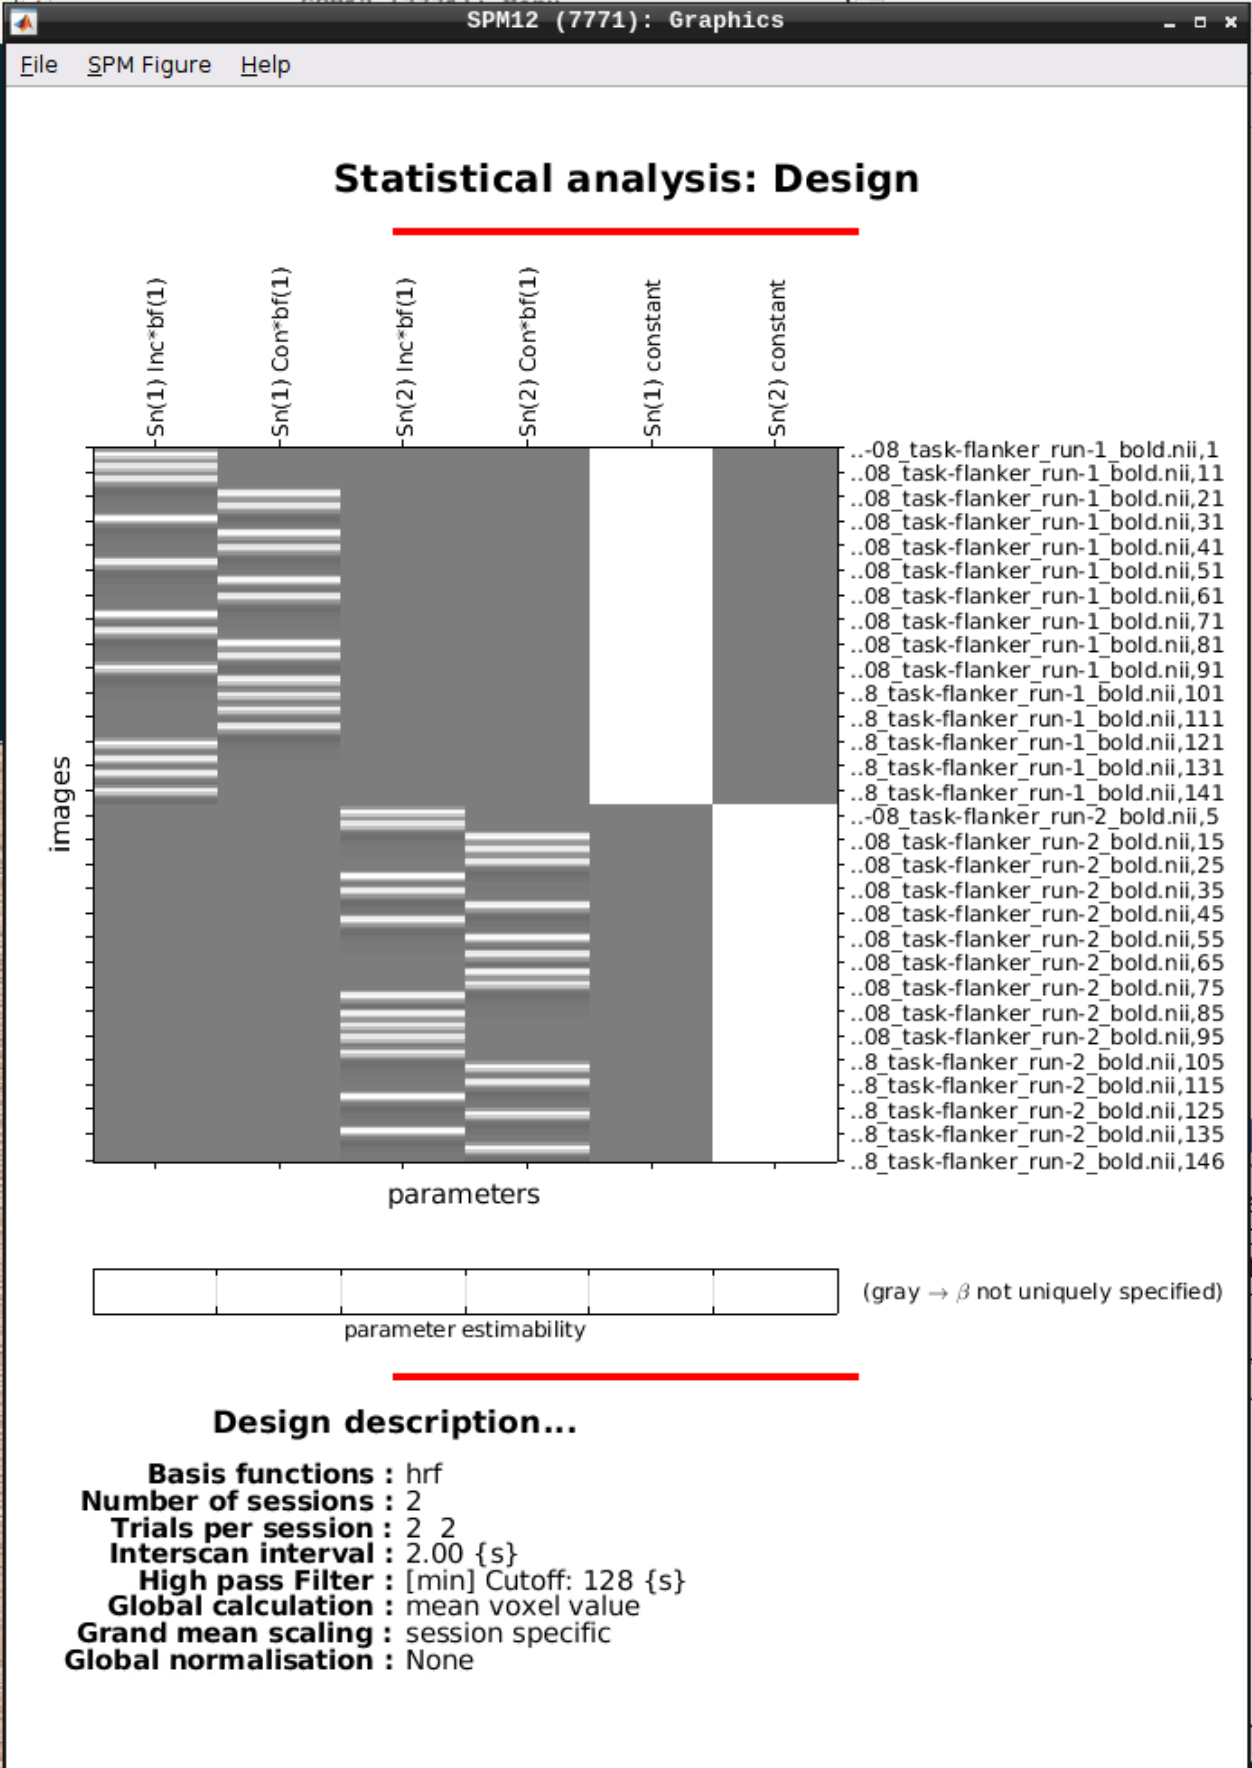
We can Review the design by clicking on Review in the SPM menu and selecting the SPM.mat file in the model directory we specified earlier and it should look like this:
Estimating the model#
Click on Estimate in the SPM menu and select the SPM.mat file, then hit the green Play button.
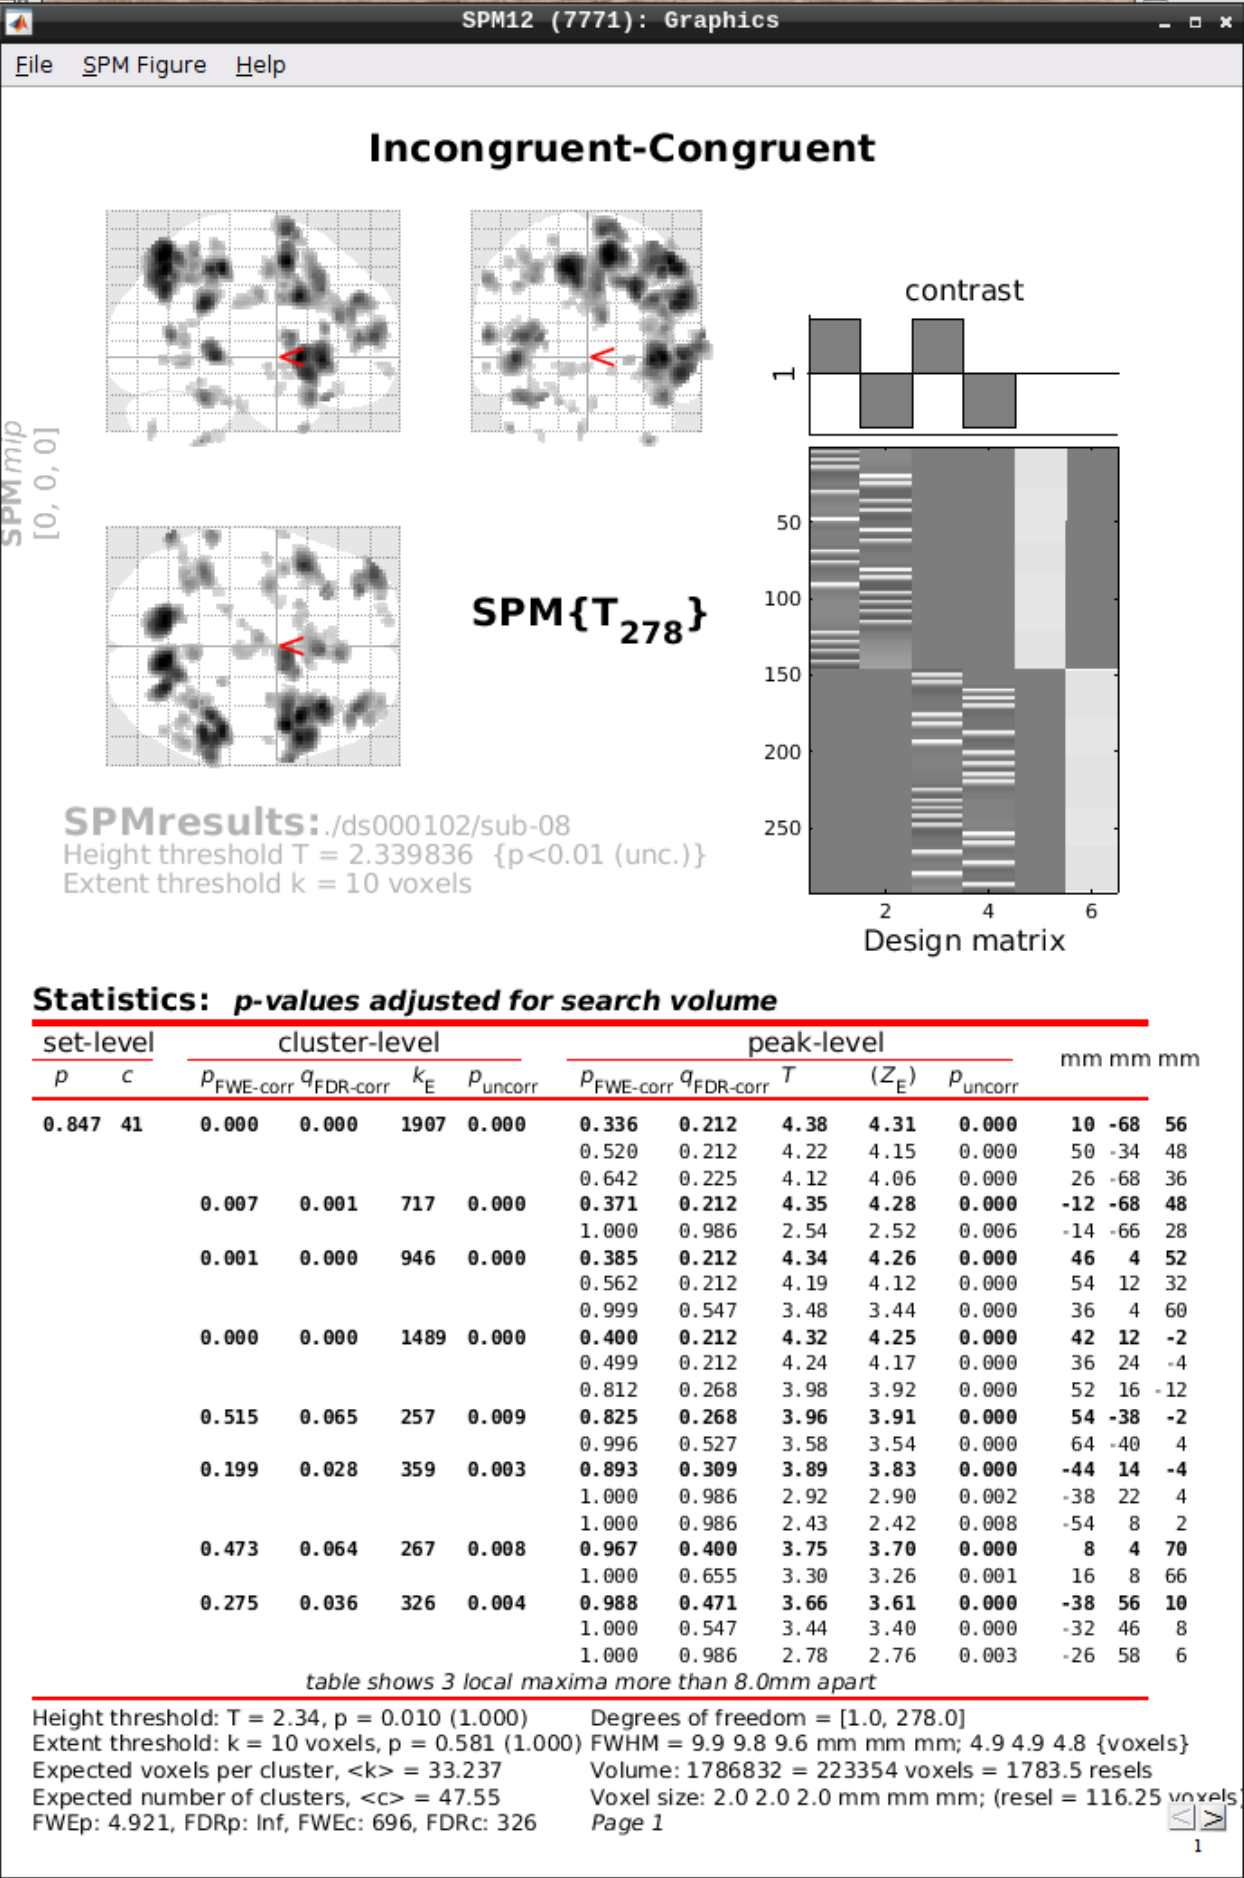
Inference#
Now open the Results section and select the SPM.mat file again. Then we can test our hypotheses:
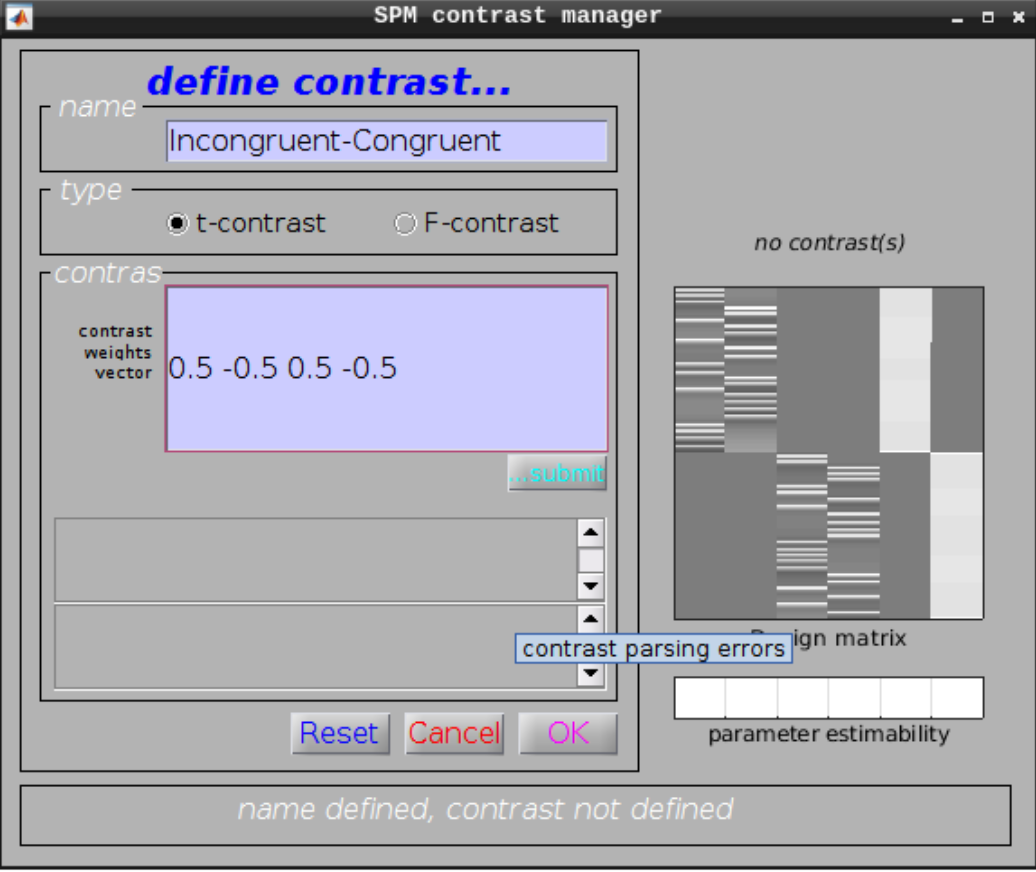
Define a new contrast as:
Name: Incongruent-Congruent
Contrast weights vector: 0.5 -0.5 0.5 -0.5
Then we can view the results. Set the following options:
masking: none”
p value adjustment to control: Click on “none”, and set the uncorrected p-value to 0.01.
extent threshold {voxels}: 10